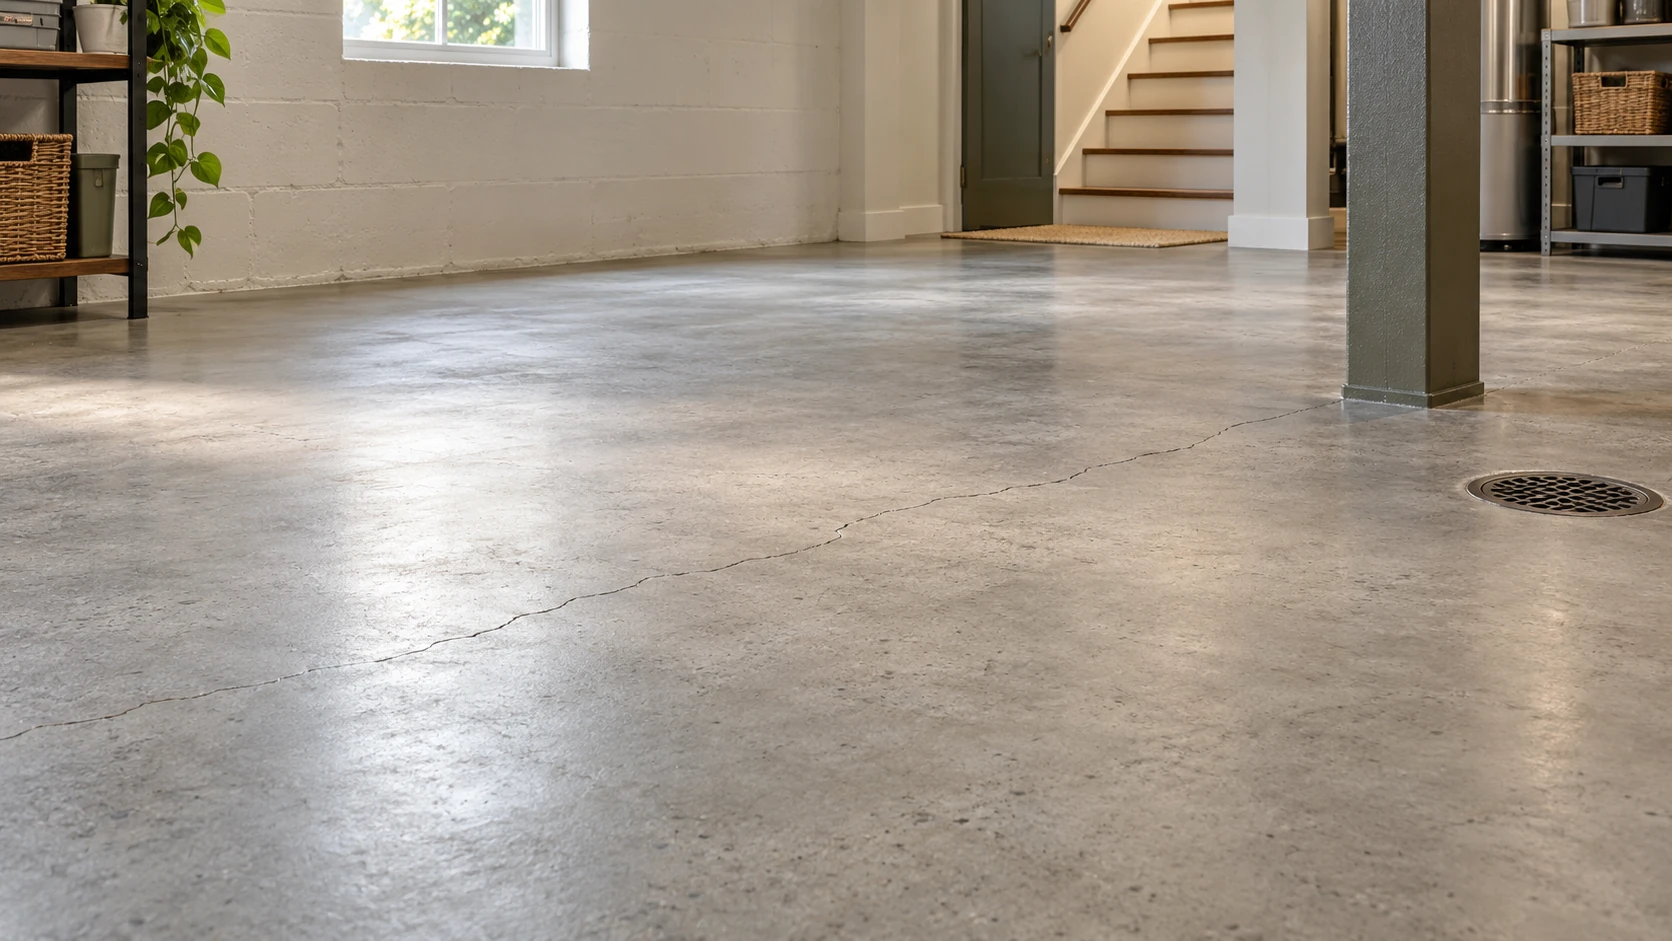
Fixing Cracks in Basement Floor: A basement floor crack may be a stable shrinkage line, a moisture pathway or evidence that part of the slab has moved. The repair material matters—but only after you establish what changed and what the repair must accomplish.
Quick answer: check the crack before you fill it
Fixing cracks in a basement floor starts with diagnosis, not filler. Photograph and measure the concrete slab crack, check for vertical movement and recurring water, and observe whether it changes. A stable, dry, non-displaced crack may suit a label-approved repair product. A raised, widening, wet or connected crack should be assessed before cosmetic repair.
Do not fill the crack yet if any of these signs are present
- One side of the crack is higher than the other.
- The slab is heaving, sinking or newly uneven.
- The crack is widening, branching quickly or returning after repair.
- Water repeatedly enters through or near the crack.
- Nearby foundation-wall cracks, sticking doors or other movement appeared at the same time.
- The concrete is loose, hollow-sounding, crumbling or extensively spalled.
- The event involves flooding, contaminated water or an electrical hazard.
Why stop? A filler can hide useful evidence without correcting movement, drainage, hydrostatic pressure or deteriorated concrete.
Fixing Cracks in Basement Floor: First identify what you are looking at
A line in a basement floor is not automatically a random crack. It may be a planned control joint, the floor-to-wall cove joint, an opening around a drain or pipe, or a broken surface area. Those conditions do not share one repair method.
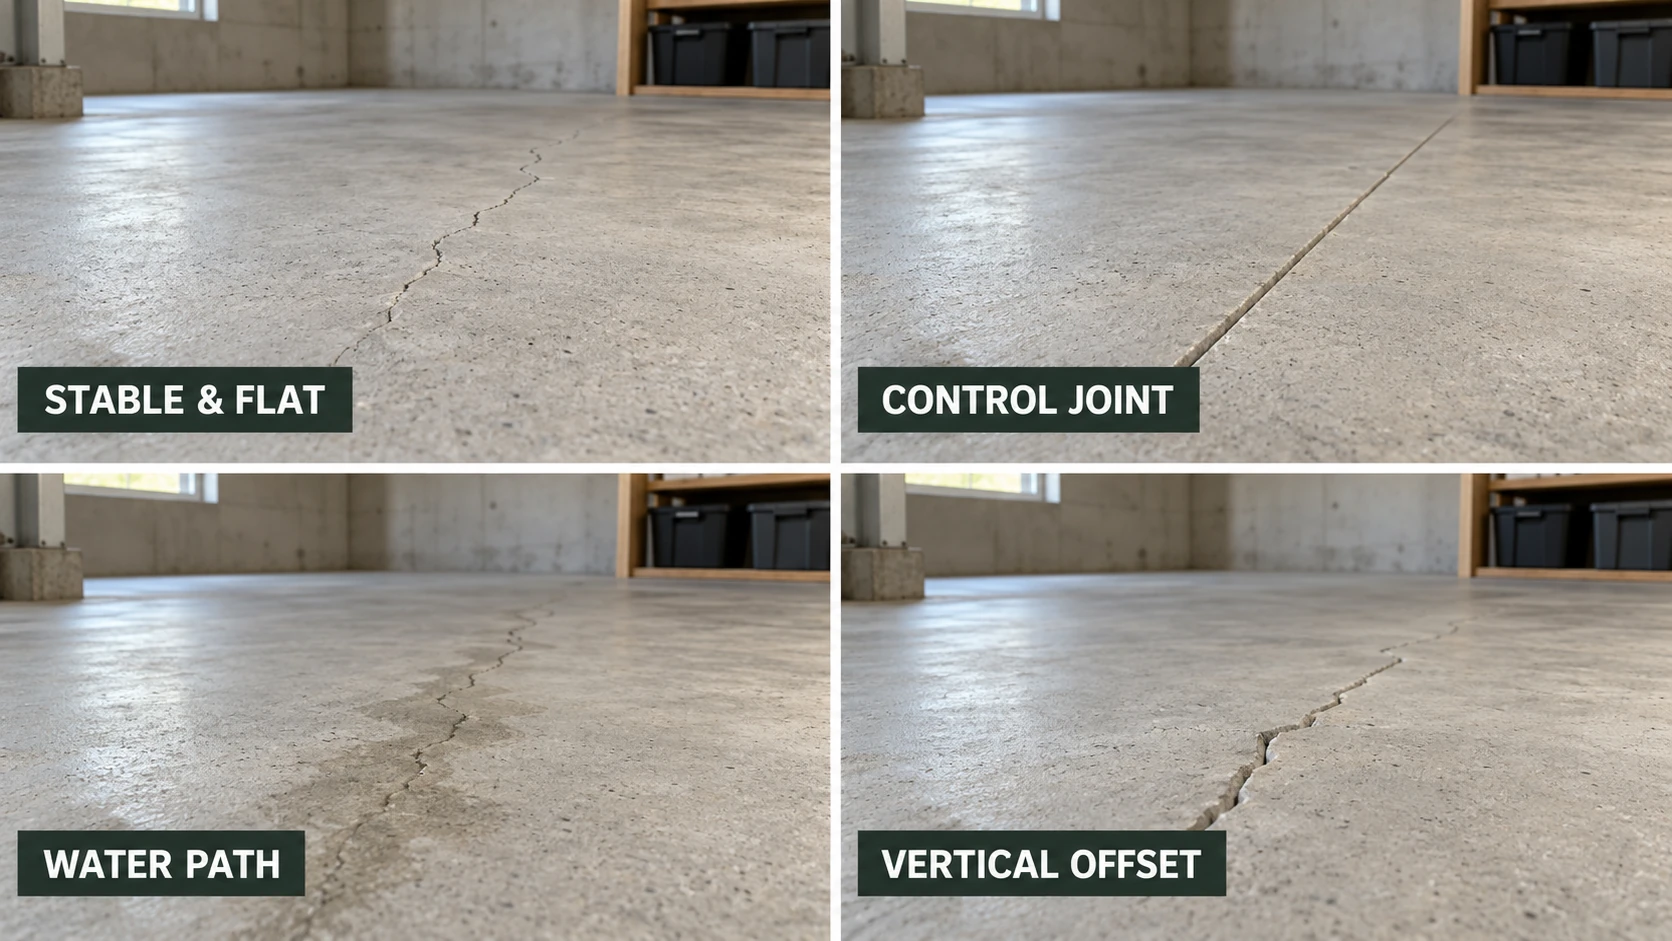
| Observation | What it may be | Safest next decision |
|---|---|---|
| Fine irregular line; both sides flat | A shrinkage-type or stable slab crack is possible. | Map, measure and check for change or moisture before selecting filler. |
| Straight tooled or saw-cut line | A control or contraction joint intended to manage cracking. | Treat it as a joint; do not rigidly bridge it without system instructions. |
| Gap where floor meets wall | Floor-to-wall or cove joint—not an ordinary field crack. | Check drainage, water path and the required movement/sealing detail. |
| One edge is raised | Settlement, heave or another dimensional change may have occurred. | Document the offset and obtain appropriate assessment before hiding it. |
| Flaking, pit or broken edge | Spalling or surface deterioration rather than a simple crack. | Assess sound concrete and repair depth; a thin crack filler may be unsuitable. |
| Darkness, staining or recurring water | A moisture path, trapped soil or prior wetting. | Investigate and control the source before treating the visible line. |
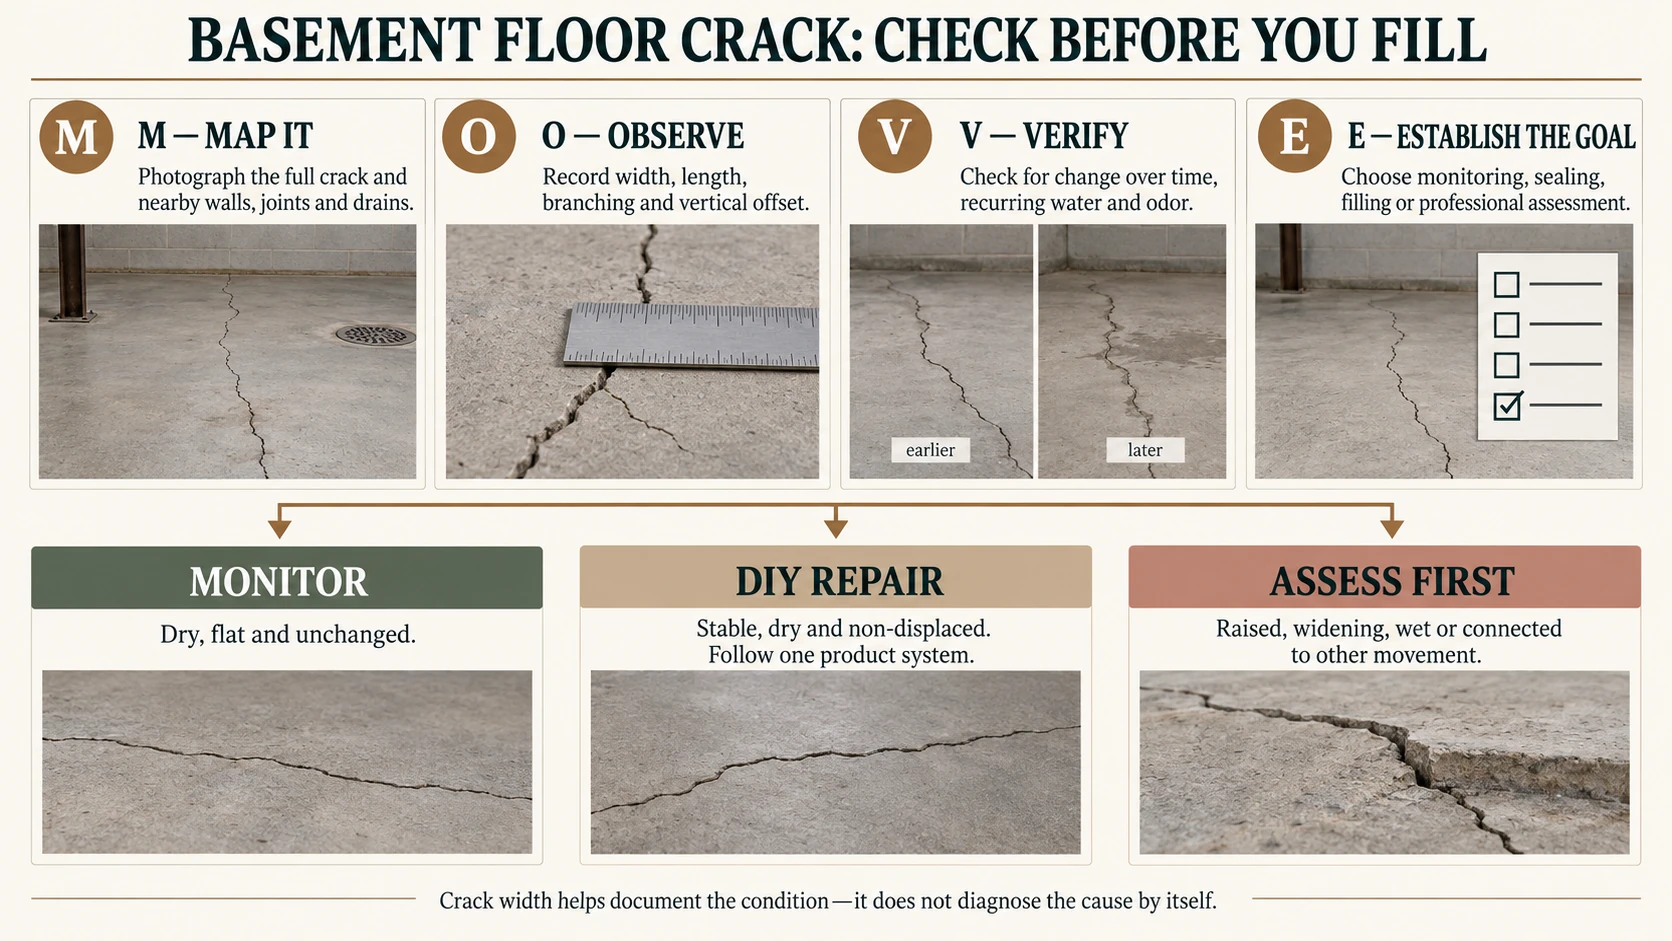
Width is documentation—not a diagnosis. Measure it because repair products have width and depth limits and because change matters. Do not declare a crack harmless or structural from one universal 1/8- or 1/4-inch rule.
Use the M.O.V.E. crack check
This four-part check turns a worrying line into useful evidence before the surface is altered.
Why basement floor slabs crack
Drying shrinkage and restraint
Concrete changes dimension as it cures and dries. Restraint and stress concentrations can produce irregular cracks, even when the visible floor remains generally flat.
Control-joint movement
A tooled or saw-cut joint encourages shrinkage movement at a planned line. It should not automatically be treated like an accidental crack.
Settlement or loss of support
Soil or fill movement and voids beneath a slab can contribute to sinking, offset or recurring cracking. The visible line is not the root repair.
Heave or expansive conditions
Upward movement can result from moisture-sensitive soil, frost in vulnerable conditions or other site factors. Raised edges deserve diagnosis before grinding or filling.
Water pressure or drainage
Groundwater, poor drainage or a plumbing event can use a crack or joint as an entry route. Surface filler does not necessarily remove the pressure or source.
Previous repair failure
Movement, contamination, wet concrete, incorrect geometry, incompatible filler or premature coating can cause debonding or recurrence.
Basement floor crack decision map
Epoxy, polyurethane or concrete patch?
The product class must match the condition, orientation, repair objective and future floor finish. The table below is a selector—not permission to substitute one brand’s preparation dimensions or cure time for another product.
| Condition and goal | Product class to investigate | Critical limitation |
|---|---|---|
| Stable, dry, non-displaced narrow slab crack Cosmetic filling or coating preparation | Pourable concrete crack filler or low-viscosity resin expressly designed for horizontal concrete. | Verify crack width/depth, dryness, movement tolerance and compatibility with the planned coating. |
| Stable prepared crack requiring a rigid bond | Concrete-rated epoxy system specified for the crack and horizontal application. | Rigid epoxy is not a default for unresolved movement; structural repair should be professionally specified. |
| Joint or crack expected to accommodate limited movement | Flexible polyurethane/concrete sealant, with backer rod and joint geometry when its instructions require them. | Flexible sealing is not slab stabilization and can fail when hydrostatic pressure or poor preparation remains. |
| Spall, pit or broken edge | Horizontal repair mortar or polymer-modified patch designed for the repair depth. | Remove unsound material and follow minimum thickness, feather-edge and curing restrictions. |
| Active water through an opening | Only a system explicitly labeled for active leakage, together with water-source diagnosis. | Hydraulic cement or surface sealant is not a universal cure for drainage failure or hydrostatic pressure. |
| Vertical offset, heave, sinking or continued change | Assessment before cosmetic material selection. | Filling the line does not restore support or identify why the slab moved. |
Manufacturer evidence: QUIKRETE publishes preparation and application options for its concrete repair products. Sika separates flexible sealants, pourable fillers, epoxy systems and repair mortars. Always open the current technical data sheet and safety data sheet for the exact product you choose.
Tools and supplies for a label-led DIY repair
Inspection and documentation
- Bright portable light
- Ruler or crack comparator
- Straightedge for checking offset
- Camera and dated notes
- Painter’s tape for repeatable reference points
Basic preparation
- Stiff non-metal or label-approved brush
- HEPA-capable vacuum appropriate for fine concrete dust
- Utility knife and caulk gun if the system requires them
- Mixing tools dedicated to the chosen system
- Backer rod only in the size and geometry specified
Personal protection
- Product-label eye protection
- Chemical-resistant gloves specified by the SDS
- Ventilation required by the product
- Clothing and footwear suited to the task
One complete repair system
- Do not mix unrelated filler systems
- Keep the technical data sheet open
- Confirm indoor use and substrate conditions
- Check cure time before traffic or coating
Concrete dust warning
Cutting, grinding or drilling concrete can generate respirable crystalline silica. OSHA identifies these tasks as silica-exposure sources. Do not casually dry-grind a basement crack. If the selected system requires routing or mechanical preparation, use an appropriate dust-control plan and qualified help where needed.
How to repair a stable, dry, non-displaced basement floor crack
This detailed sequence applies only after the diagnostic gate. The exact product instructions control crack dimensions, preparation, primer, backer rod, mixing, temperature, moisture, application thickness and curing.
Confirm that the crack remains a DIY candidate
Verify that both sides are flat, the crack is not changing, water is not recurring and no related foundation or building movement is evident. When uncertain, preserve the evidence and obtain assessment.
Photograph and mark repeatable reference points
Record the full crack before altering it. Measure at the same two or three points and note any prior filler, coating, oil, adhesive or dampness.
Define the repair objective
Decide whether the goal is appearance, debris exclusion, limited movement accommodation, air sealing or preparation for a coating. Do not buy a material until its labeled use matches that goal.
Select one complete product system
Confirm indoor horizontal-concrete use, allowed crack width/depth, substrate moisture, movement capability and coating compatibility. Read both the current technical data sheet and SDS.
Make the workspace safe
Isolate the area, provide required ventilation and use the specified gloves and eye protection. Keep ignition sources, children and pets away as the label directs.
Remove loose contamination without spreading dust
Brush and vacuum loose debris using the least aggressive approved method. Oil, paint, old filler and weak concrete can prevent bonding. Do not rinse a product-required dry crack unless its instructions explicitly permit that preparation and provide a drying condition.
Create only the geometry the product requires
Some systems need minimum width/depth, an undercut, backer rod or a specific joint profile; others are designed to penetrate narrow cracks without routing. Never borrow dimensions from another product. If grinding is required, stop unless silica exposure can be controlled properly.
Prime, mix and apply exactly as instructed
Observe component ratios, mixing time, pot life and working temperature. Fill from the bottom when directed and avoid trapping voids. Do not thin a repair product or combine leftovers from unrelated systems.
Tool the surface without overworking it
Finish flush or to the specified profile. Protect adjacent concrete from smears, especially when the floor will remain exposed or receive a transparent coating.
Respect cure and return-to-service limits
Temperature and moisture affect cure. Keep traffic, cleaning water, paint, flooring and coatings off the repair until the selected system permits the next step.
Document and recheck
Photograph the cured repair. If the crack reappears, opens beside a rigid repair, becomes wet or develops offset, stop patching and investigate the unresolved condition.
If the basement floor crack is wet or leaking
First stop a controllable plumbing or appliance leak when it is safe to do so. For rain- or groundwater-related entry, record when the water appears and inspect the broader route: roof runoff, gutters and discharge, grading, foundation perimeter, sump or drainage system, floor-to-wall joint and possible moisture from beneath the slab.
A surface repair may close the visible opening while water finds another path or defeats the bond. Sika’s product FAQ notes that high hydrostatic pressure can cause sealant failure. Treat water-source control and visible crack sealing as separate decisions.
Flood and contamination boundary
Do not reduce significant flooding or contaminated water to a DIY crack-filler project. Address electrical safety, contamination and drying of the building assembly using qualified emergency or restoration guidance.
Will sealing basement floor cracks stop radon?
Not reliably by itself. The U.S. Environmental Protection Agency describes sealing cracks and other foundation openings as a basic part of many radon-reduction approaches, but it does not recommend sealing alone because it has not consistently reduced radon levels enough. Test the home and follow qualified mitigation guidance rather than treating crack filler as proof of radon control.
Read the EPA Consumer’s Guide to Radon Reduction and use EPA-recognized state or proficiency-program resources when professional mitigation is needed.
Repairing cracks before paint, epoxy or finished flooring
A repair that looks acceptable on bare concrete may still be unsuitable beneath a coating or floor covering. Confirm four systems together: the existing slab, crack repair, moisture/vapor condition and planned finish. Check whether the finish manufacturer requires grinding, a specific surface profile, moisture testing, flexible joint treatment or a compatible primer.
Do not rigidly fill a movement joint merely to create a smooth coating surface. Do not coat over uncured repair material or recurring moisture. If laminate flooring will cover the slab, also review how laminate flooring responds to water and moisture from below.
Why basement floor crack repairs fail
| What happened | Likely contributing factor | Next move |
|---|---|---|
| Filler peeled from the sides | Dust, oil, old coating, weak concrete, moisture or inadequate preparation. | Stop adding layers; identify contamination and follow the system’s removal/preparation instructions. |
| Repair sank or contains voids | Incorrect depth, missing backer rod where required, trapped air or bridging. | Check the product geometry and rework limits before attempting another lift. |
| Crack returned through or beside repair | Ongoing movement or a rigid material used where movement remained. | Document the new line and obtain diagnosis rather than repeatedly concealing it. |
| Repair stays soft or tacky | Mixing ratio, temperature, moisture, expired product or cure-time problem. | Isolate the area and contact the manufacturer with batch and application details. |
| Water reappeared | The source or pressure was not controlled, or water found a nearby route. | Investigate drainage/moisture; do not assume a stronger surface filler is the answer. |
Who should inspect a concerning crack?
The appropriate person depends on the unresolved question. A licensed structural engineer can evaluate suspected structural movement independently. A qualified concrete or foundation professional can assess repair execution. A waterproofing/drainage specialist may be appropriate for recurring water, while a certified radon professional addresses elevated radon. For a warranty claim, contact the builder, installer or manufacturer before altering the evidence.
Ask the provider to identify the observed condition, proposed cause, repair objective, material/system, limitations and what happens if movement or water returns. A sales quote is not automatically an independent structural opinion.
Frequently asked questions
Are cracks in a basement floor normal?
Fine, non-displaced slab cracks are common, but “common” does not diagnose an individual crack. Photograph it, check whether it changes, look for vertical offset and recurring moisture, and consider nearby building symptoms before deciding to ignore or fill it.
Should every hairline basement floor crack be filled?
No. A dry, stable hairline crack may need only monitoring unless appearance, air sealing or a future coating creates a clear repair objective. The selected product must also be rated for that crack width and condition.
When should I worry about a basement floor crack?
Seek assessment when it is widening, vertically displaced, associated with heave or sinking, repeatedly wet, returning after repair, surrounded by deteriorated concrete or accompanied by related wall or building movement.
Is epoxy or polyurethane better for a basement floor crack?
Neither is universally better. A rigid epoxy may suit a stable crack and specific bonding objective; a flexible polyurethane sealant may suit a movement-accommodating sealing objective. Substrate moisture, geometry, orientation, movement, coating compatibility and the exact product instructions control.
Can hydraulic cement fix a leaking floor crack?
Only use it where the exact product label permits the condition and application. Stopping visible water at one opening does not necessarily correct hydrostatic pressure, drainage failure, slab movement or another water route.
Can water come up through a basement floor crack?
Water can enter through cracks, joints and penetrations when moisture conditions and pressure provide a path. Determine whether the source is plumbing, surface drainage, groundwater, the cove joint or moisture below the slab before relying on a surface repair.
Will sealing a basement floor crack stop radon?
Sealing openings may support a radon-reduction system, but EPA does not recommend sealing alone as a complete radon solution. Test the home and use qualified mitigation guidance when levels are elevated.
Can I apply epoxy floor coating over a repaired crack?
Only when the repair and coating systems are compatible, the repair has cured, movement joints are treated correctly, and the slab meets the coating’s moisture and surface-preparation requirements.
How can I tell whether a crack is still moving?
Use dated photographs and repeatable measurement points, and watch for widening, new branching, recurring separation or vertical offset. Consumer monitoring cannot prove structural stability; uncertainty or change warrants appropriate assessment.
Can I grind down a raised basement floor crack?
Do not grind before determining why the sides are vertically displaced. Grinding changes only the visible trip edge, can hide evidence and creates silica dust. Diagnose movement and use proper dust controls or qualified help if mechanical work is appropriate.
The safest final decision
Monitor a dry, flat and unchanged line when no repair objective exists. Consider a label-matched DIY repair only for a stable, dry, non-displaced crack with a defined goal. Assess first when the slab is raised, changing, repeatedly wet or connected to other movement.
The repair should follow the evidence—not cover it.
Authoritative sources
Editorial method: This guide separates general diagnostic principles, public-agency safety guidance, manufacturer-specific product instructions and CareBySurface decision rules. It does not diagnose structural movement, hidden moisture or radon from an image. Manufacturer documents and local requirements can change; verify current instructions for the exact repair system and property.