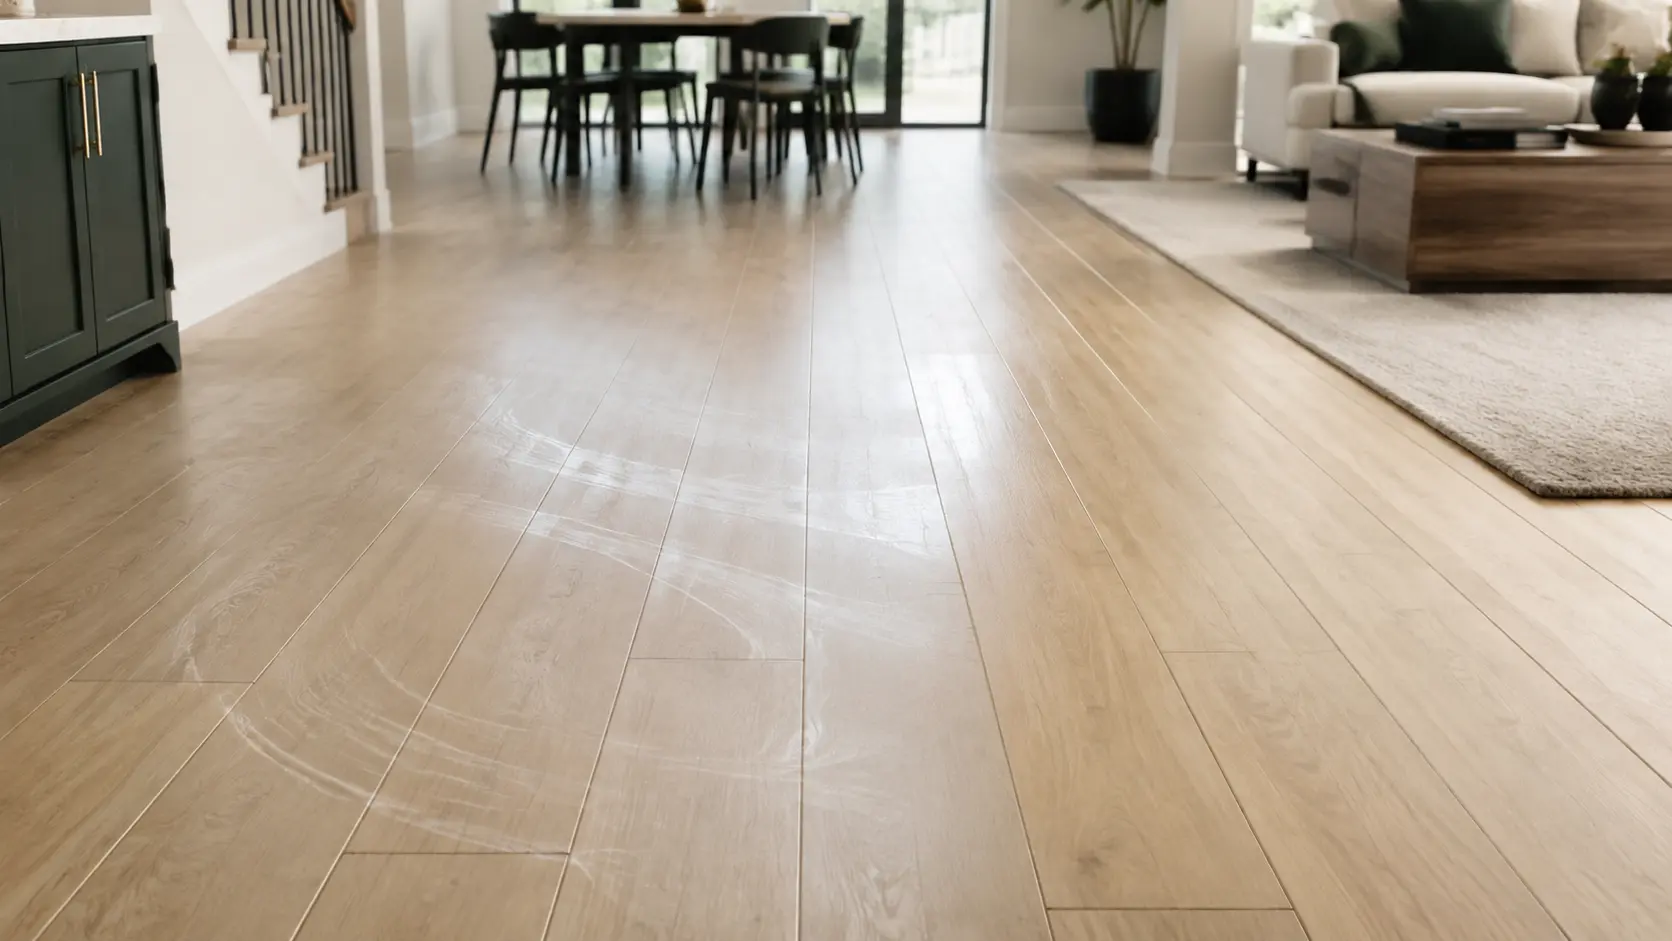
Learning how to clean LVP flooring safely starts with the exact floor—not a universal homemade recipe. The wear surface, installation method and manufacturer instructions determine which cleaner, moisture level and stain treatments are acceptable. This guide gives you a controlled routine and deep-cleaning method, then helps you tell removable film from scratches, finish wear or seam damage.
Quick answer
How to clean LVP flooring safely
Remove loose grit with a soft broom, microfiber dust mop or vacuum on its bare-floor setting. Damp-mop small sections with a clean microfiber pad and the cleaner approved for your exact floor. Use only the label-directed amount, leave no puddles at seams, and let the floor dry before judging the result. Avoid steam, vinegar, polish and abrasive pads unless the installed-floor manufacturer expressly permits them.
First confirm what floor you actually have
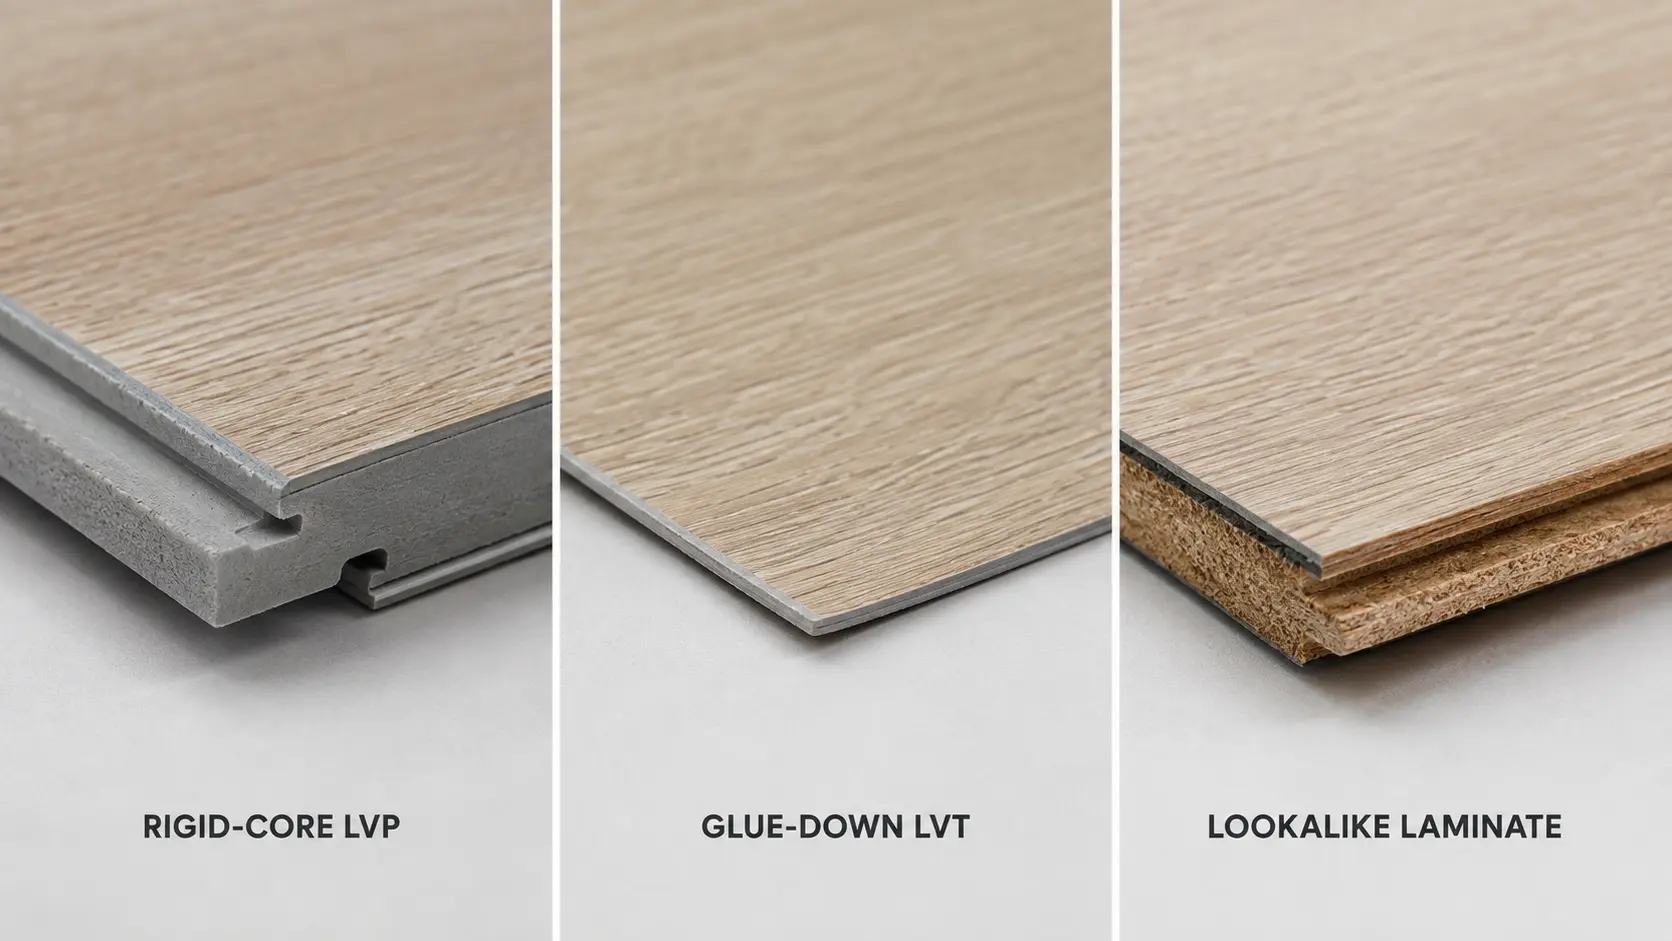
LVP means luxury vinyl plank; LVT usually means luxury vinyl tile. Both are resilient flooring, but products vary. A floating rigid-core floor may have an SPC or WPC core and click-lock joints. A flexible plank or tile may be glued directly to the subfloor. Some products have beveled edges; others have grout-like joints. Laminate and bamboo can also imitate vinyl convincingly.
The visible finish controls cleaner compatibility, while the core, seams and installation control how moisture behaves. Find the carton label, receipt, product page or installation paperwork. Record the manufacturer, collection, product code, installation type and care-guide version. If you rent, ask the property manager rather than guessing.
Tools and supplies
Required
- Soft broom or microfiber dust mop
- Vacuum with the rotating brush switched off
- Clean microfiber flat mop
- At least one spare mop pad
- Exact manufacturer-approved cleaner
- Dry absorbent microfiber towel
Do not start with
- Steam mop
- Wet string or sponge mop
- Vinegar or baking-soda paste
- Bleach or ammonia without maker approval
- Wax, polish or “restore shine” product
- Magic eraser, scrub powder or abrasive pad
The barely-damp check
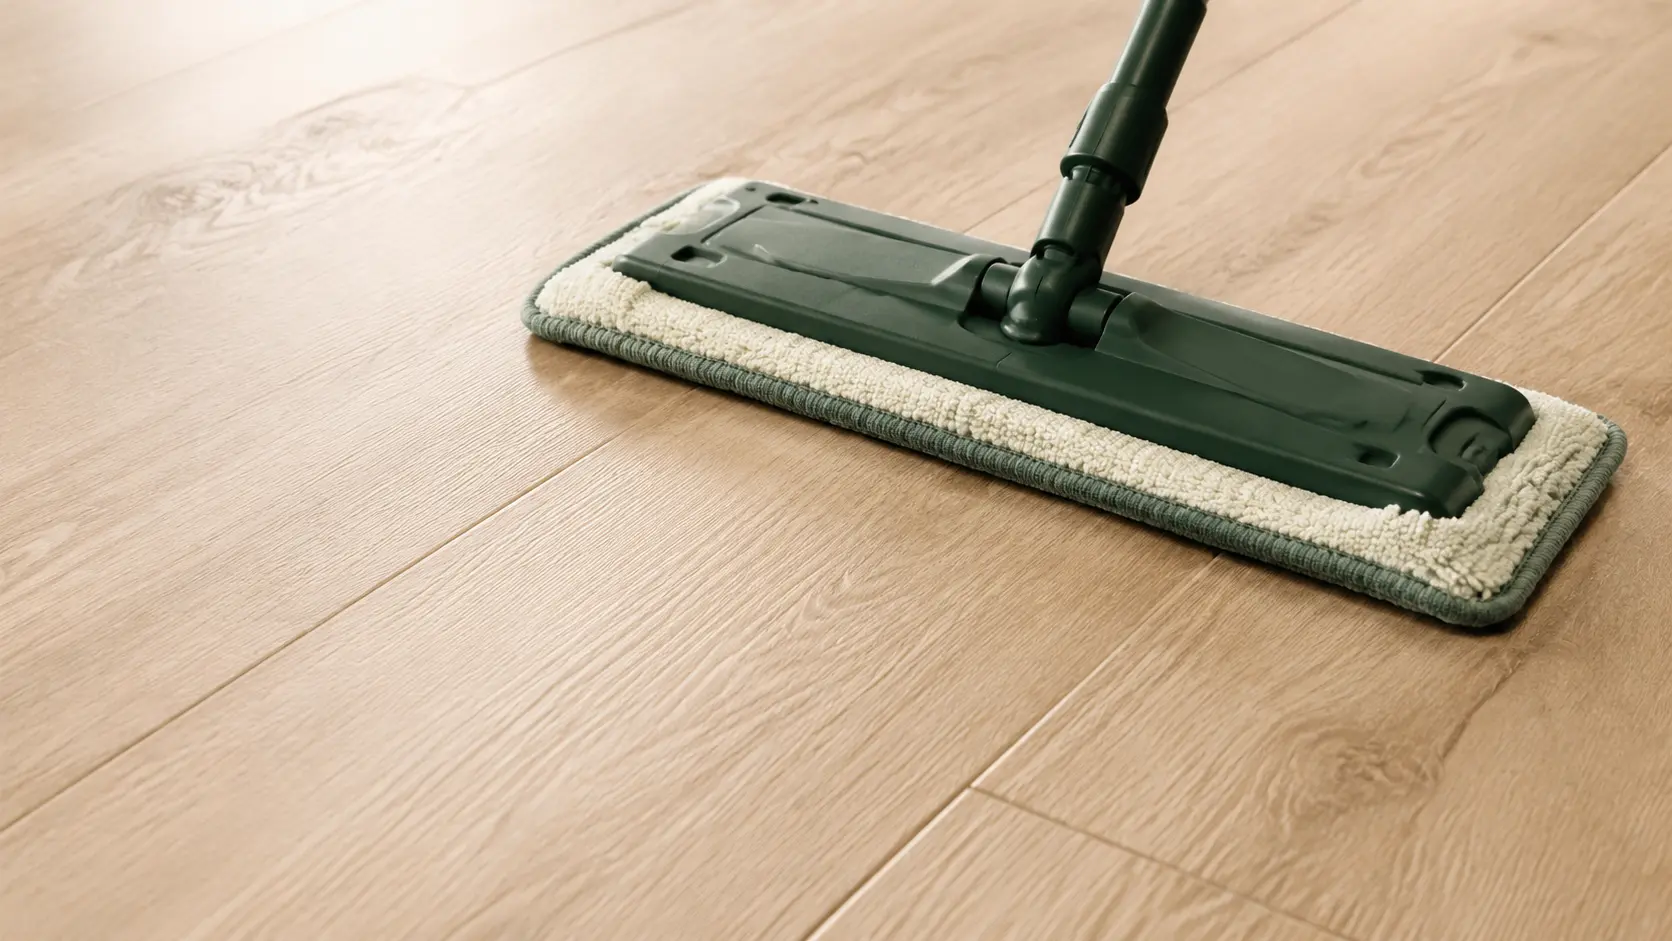
A prepared pad should feel evenly damp but should not drip when pressed. It should not leave a wet trail or liquid in bevels. If your mop is pushing a visible wave of solution, it is too wet for this method.
How to clean LVP flooring in 7 steps
Read the installed floor’s care instructions
Confirm the approved cleaner, dilution, application method, rinse instruction, prohibited ingredients and steam policy. Check whether a newly installed glue-down or grouted floor has a waiting period before wet maintenance.
Checkpoint: You can name the manufacturer and product, or you have chosen a conservative test-area baseline because the product is unknown.
Remove grit before adding moisture
Sweep, dust-mop or vacuum the full area, including edges. Use a bare-floor attachment and turn off the beater bar. Sand, pet litter and tracked grit can scratch the wear surface when trapped beneath a wet mop.
Checkpoint: No visible crumbs, grit or hair remain in the cleaning path.
Prepare clean pads and solution
Use a freshly laundered microfiber pad without fabric-softener residue. If the cleaner is concentrated, measure it exactly; excess product is a common cause of dull or sticky film. Keep a spare pad ready instead of trying to clean a whole floor with one dirty pad.
Checkpoint: The solution matches the label and the pad is clean, not saturated.
Test a hidden section
Clean a small inconspicuous area, then allow it to dry. Inspect from standing height and under angled light. Look for color transfer, tack, unexpected gloss or dullness, whitening and edge change.
Checkpoint: The dry test area looks and feels unchanged except for soil removal.
Damp-mop controlled sections
Apply the cleaner as its label directs—often to the pad or in a light, controlled spray. Work in small sections using overlapping passes with the plank direction. Avoid repeated scrubbing unless the maker permits it.
Checkpoint: The mop is lifting soil rather than redistributing gray water or leaving arcs.
Protect seams and change dirty pads
Pick up any drops immediately. Do not pour cleaner onto the floor, flood textured areas or let solution dwell at joints. Replace the pad when it becomes visibly dirty, greasy or starts leaving tracks.
Checkpoint: No liquid is standing in bevels, perimeter gaps or beneath appliances.
Dry fully, then inspect
Blot remaining moisture with a dry towel and let the floor dry completely before walking on it or adding another product. Inspect under side light. A wet floor can temporarily hide haze and make normal low gloss look uneven.
Dry-result checkpoint: If the floor is uniformly clean, non-sticky and unchanged at the seams, stop. More chemistry is not an improvement.
Choose a cleaner by permission, not popularity
The safest order is simple: use the exact product named in the care guide; then another product expressly approved by the floor maker; then a vinyl-labeled pH-neutral category only when the maker allows categories. A product being safe for “hard floors” does not prove it is compatible with your LVP.
| Cleaner or method | Safe default? | Decision rule |
|---|---|---|
| Exact maker-recommended cleaner | Best starting choice | Follow dilution, dwell, application and rinse directions for the installed product. |
| pH-neutral cleaner labeled for vinyl | Conditional | Use only if the flooring guide permits a compatible category rather than a named formula. |
| Plain-water damp pass | Conditional | Useful only when the maker permits it; do not flood seams or override a no-water instruction. |
| Vinegar | Not a universal default | Some publishers recommend it, while COREtec and Amtico reject it. Use only with explicit product approval. |
| Dish soap/detergent | Poor default | It can leave a sticky or dull film. Do not substitute it for approved cleaner without permission. |
| Bleach or disinfectant | Brand- and purpose-specific | Amtico permits a particular dilution on its own flooring; that is not cross-brand authorization. |
| Ammonia | Brand-specific exception | Mannington specifies non-sudsy ammonia for certain ADURA products. Do not generalize that instruction. |
| Steam | No, unless expressly approved | Heat and moisture can affect wear layers, joints or adhesive and may conflict with the warranty. |
| Wax, polish or shine restorer | No for diagnosis | First determine whether dullness is residue, intended low gloss or wear. Use only an approved finish system. |
Why this is conditional: COREtec rejects vinegar and detergent; Amtico rejects vinegar and steam but permits a product-specific bleach dilution; and Mannington gives a product-line ammonia instruction. The installed floor’s current guide is the controlling source.
What “deep cleaning” should mean for LVP
Deep cleaning should improve soil capture, not multiply heat, water or chemicals. Begin with a fresh pad, measured approved cleaner and smaller work zones. Loosen only the soil the care guide allows you to treat. Remove spent solution instead of moving it across the room, and complete a permitted clean-water pass only when the label or residue diagnosis calls for one.
Do not improvise with a floor stripper. Some resilient-floor systems have manufacturer-approved stripping or refresh products; others do not. Grouted products, applied finishes and low-gloss surfaces can have special restrictions. If routine cleaning does not improve a fully dry test area, diagnose the appearance before escalating.
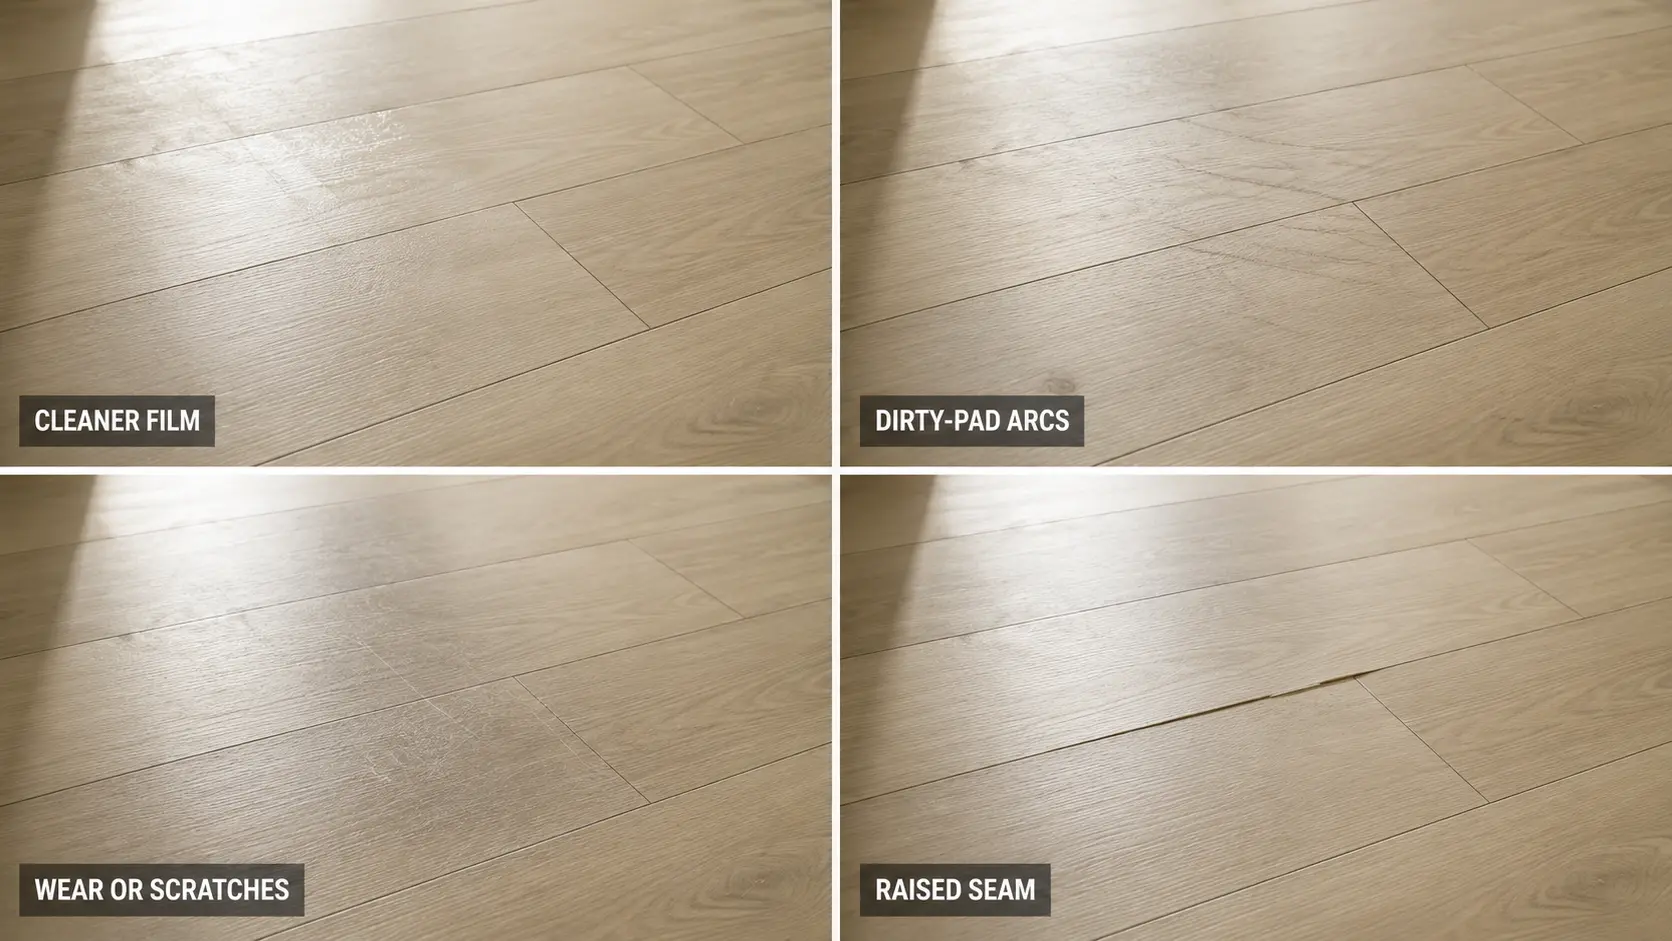
Is it cleaner film, scratches or seam damage?
| What you observe | Likely explanation | Safest next move |
|---|---|---|
| Haze follows broad mop arcs | Dirty pad or redistributed solution | Stop, replace the pad and test one small area with the permitted method. |
| Uniform haze improves during a permitted water test | Cleaner residue | Complete one controlled residue-removal pass, then dry and reassess. |
| Sticky footprints quickly return | Excess cleaner, soap, oil, polish or incompatible refill | List prior products before adding chemistry; contact the maker for buildup removal. |
| Fine lines remain fixed and catch side light | Scratches or micro-abrasion | Stop scrubbing. Cleaning cannot replace the wear surface. |
| Dull lanes match traffic paths | Wear, abrasion or embedded soil | Compare an edge area; seek maker-approved restoration guidance. |
| White line, raised edge or changed seam | Residue, joint movement, moisture or subfloor issue | Stop wet cleaning; photograph and assess seam height and moisture source. |
| Layer flakes, peels or color transfers | Finish/coating failure or chemical damage | Stop chemicals and contact the manufacturer or flooring professional. |
Decision map
LVP cleaning decision path
Handle spills and scuffs without flooding the floor
| Problem | First action | Stop condition |
|---|---|---|
| Water or drink | Blot promptly; use approved cleaner only if residue remains. | Darkness, odor or a raised seam remains after drying. |
| Greasy food | Lift solids, then spot-clean with the approved formula and a white cloth. | The slick area spreads or color transfers. |
| Pet accident | Blot without pressing liquid into joints; follow the floor maker’s sanitation guidance. | Odor, swelling, discoloration or liquid beneath a joint. |
| Rubber/scuff transfer | Try a dry microfiber cloth, then the approved spot cleaner. | Sheen changes or the mark is a gouge rather than transfer. |
| Dried unknown material | Soften only as permitted and lift with a nonmetallic tool held nearly flat. | The wear surface begins to whiten, scratch or lift. |
Avoid treating every black mark with solvent or every food stain with baking soda. The mark may sit on the finish, penetrate a seam, chemically discolor the wear layer or be physical damage. Test gently and stop at the first surface change.
Can you steam-mop LVP flooring?
Do not use steam unless the current care guide for the exact installed product explicitly approves it. COREtec says to avoid steam unless manufacturer guidance permits it; Amtico and Karndean advise against it, while Armstrong discourages the combination of heat and moisture. A retailer’s general low-setting suggestion cannot override the flooring warranty.
“Waterproof” describes a product performance claim, not permission to force hot vapor toward joints, adhesive or the subfloor. For normal cleaning, controlled damp microfiber is the lower-risk default.
A practical LVP care schedule
As needed
Blot spills and remove abrasive grit before it is tracked through the room.
Routine
Dry-clean traffic areas. Damp-clean only when visible soil or the care guide’s schedule calls for it.
Periodically
Inspect entryways, chair zones, kitchen seams, pet areas and transitions under side light.
Before changing products
Check the maker guide and clean a hidden test area. Do not layer cleaners, polish and disinfectant.
Use non-staining entrance mats, noting that some manufacturers warn against rubber or latex backing. Keep felt protectors clean, lift furniture instead of dragging it, and use hardboard runways when moving heavy appliances. If your floor is actually bamboo rather than vinyl, use the separate bamboo flooring cleaning guide.
When cleaning should stop
Stop adding water or chemicals when you see raised or soft edges, cupping, new gaps, persistent darkness at a seam, peeling, whitening, color transfer, plank movement or a musty odor. Cleaning cannot repair a failed joint, damaged wear layer, adhesive release or moisture beneath the floor.
Photograph the completely dry area in normal and side light. Record every cleaner, dilution, mop, spill and steam exposure. Contact the manufacturer or installer first for a warranty-sensitive issue; use a qualified flooring or moisture professional when the subfloor, leak or widespread movement may be involved.
LVP flooring cleaning FAQ
What is the best cleaner for LVP flooring?
The best starting cleaner is the exact formula named or approved by the installed-floor manufacturer. If its care guide permits a category, choose a pH-neutral product specifically labeled for vinyl and follow its dilution and rinse directions. “Natural,” “hard-floor safe” or a familiar brand name does not establish compatibility.
Can I mop luxury vinyl plank flooring with water?
Many products allow a damp microfiber mop, but avoid wet mopping or pouring water onto the floor. Use the minimum liquid required, keep it out of seams and dry visible moisture. If the care guide specifies a ready-to-use cleaner or different process, follow that instruction instead.
Can I use vinegar to clean LVP?
Do not treat vinegar as universally safe. Some editorial guides recommend diluted vinegar, while manufacturers including COREtec and Amtico tell owners not to use it on their products. Unless the exact flooring maker approves vinegar in writing, use its recommended cleaner instead.
Why is my LVP sticky after mopping?
Common causes include too much concentrate, a no-rinse product used incorrectly, dish soap, oil-based cleaner, polish, a dirty pad or incompatible spray-mop refill. Let the floor dry, list prior products and test a maker-permitted residue pass in a small area. Do not cover the film with shine restorer.
How do I remove haze from vinyl plank flooring?
First decide whether the haze moves with a clean dry cloth, follows mop arcs or remains fixed in traffic lanes. Movable haze may be residue; fixed dullness may be abrasion or wear. Use one controlled residue test only if the care guide permits it, then stop if the sheen changes or there is no improvement.
Can I use a robot mop on LVP?
Only when the floor manufacturer permits automated damp cleaning and the robot’s liquid output and solution are compatible. Use a clean pad, the lowest practical moisture, no repeated wet passes and no dripping dock. If the floor or permission is unknown, use dry vacuum mode.
Should LVP flooring be polished?
Usually not as a routine cleaning step. Many factory-finished LVP products reject wax, polish and mop-and-shine coatings, although some manufacturers sell product-specific refresh systems. Diagnose film and wear first; apply a finish product only when the exact floor’s care guide calls for it.
How often should I deep-clean LVP?
Use soil and traffic—not a rigid calendar—as the trigger. Remove grit frequently and damp-clean when dry methods no longer remove visible soil. A deeper maker-approved clean may be occasional. Repeated wet cleaning can create residue and unnecessary seam exposure without improving a floor that is already clean.
Can scratches be cleaned out of LVP?
No. Cleaning may remove dark transfer sitting over a scratch, but it cannot rebuild a cut or abraded wear layer. If a line remains fixed under side light, stop rubbing and consult the manufacturer about an approved repair, plank replacement or professional assessment.
Sources and editorial method
This guide uses a manufacturer-first hierarchy because LVP care rules differ by product line. Core references: Shaw vinyl care, COREtec LVP cleaning, Mannington ADURA care, Karndean cleaning and care, Amtico cleaning guidance, Armstrong vinyl care and the Resilient Floor Covering Institute. Check dates and product documents again before publication.
General information cannot identify hidden moisture, installation failure or a specific coating from appearance alone. Current instructions and warranty terms for the installed product take priority.
The safest way to clean LVP flooring
Identify the floor, remove grit, use its approved cleaner with a clean barely damp microfiber pad, control liquid at every seam and inspect only after drying. If haze moves, diagnose residue. If lines, dull lanes or raised joints remain fixed, stop treating them as dirt and move to finish, repair or moisture guidance.