A practical method for natural-cleft and honed slate—plus what to do when white film, trapped dirt, flaking layers or an unknown coating remain after cleaning.
How to clean slate tiles safely
Remove loose grit, test a hidden spot, then clean small sections with a properly diluted pH-neutral cleaner approved for natural stone. Use a soft nylon brush where dirt is caught in natural-cleft texture, pick up the dirty solution instead of spreading it, rinse if the label requires it, and let the slate dry completely before judging the result.
Slate is durable, but “slate tile” does not describe one uniform surface. A rough natural-cleft floor, a honed hearth, a sealed shower and a topically coated entryway may react differently to the same cleaner. The safest approach is to identify what you have before choosing more chemistry or pressure.
This guide focuses on routine household cleaning—not stripping an old coating, removing construction residue or restoring damaged stone. If the tile is flaking, a coating is turning milky, or moisture keeps returning, more cleaning may make the problem harder to diagnose.
First, confirm what kind of slate surface you have
Look at a spare tile, invoice or product specification if one is available. Visual clues can guide a first check, but appearance alone cannot conclusively identify the stone or treatment.
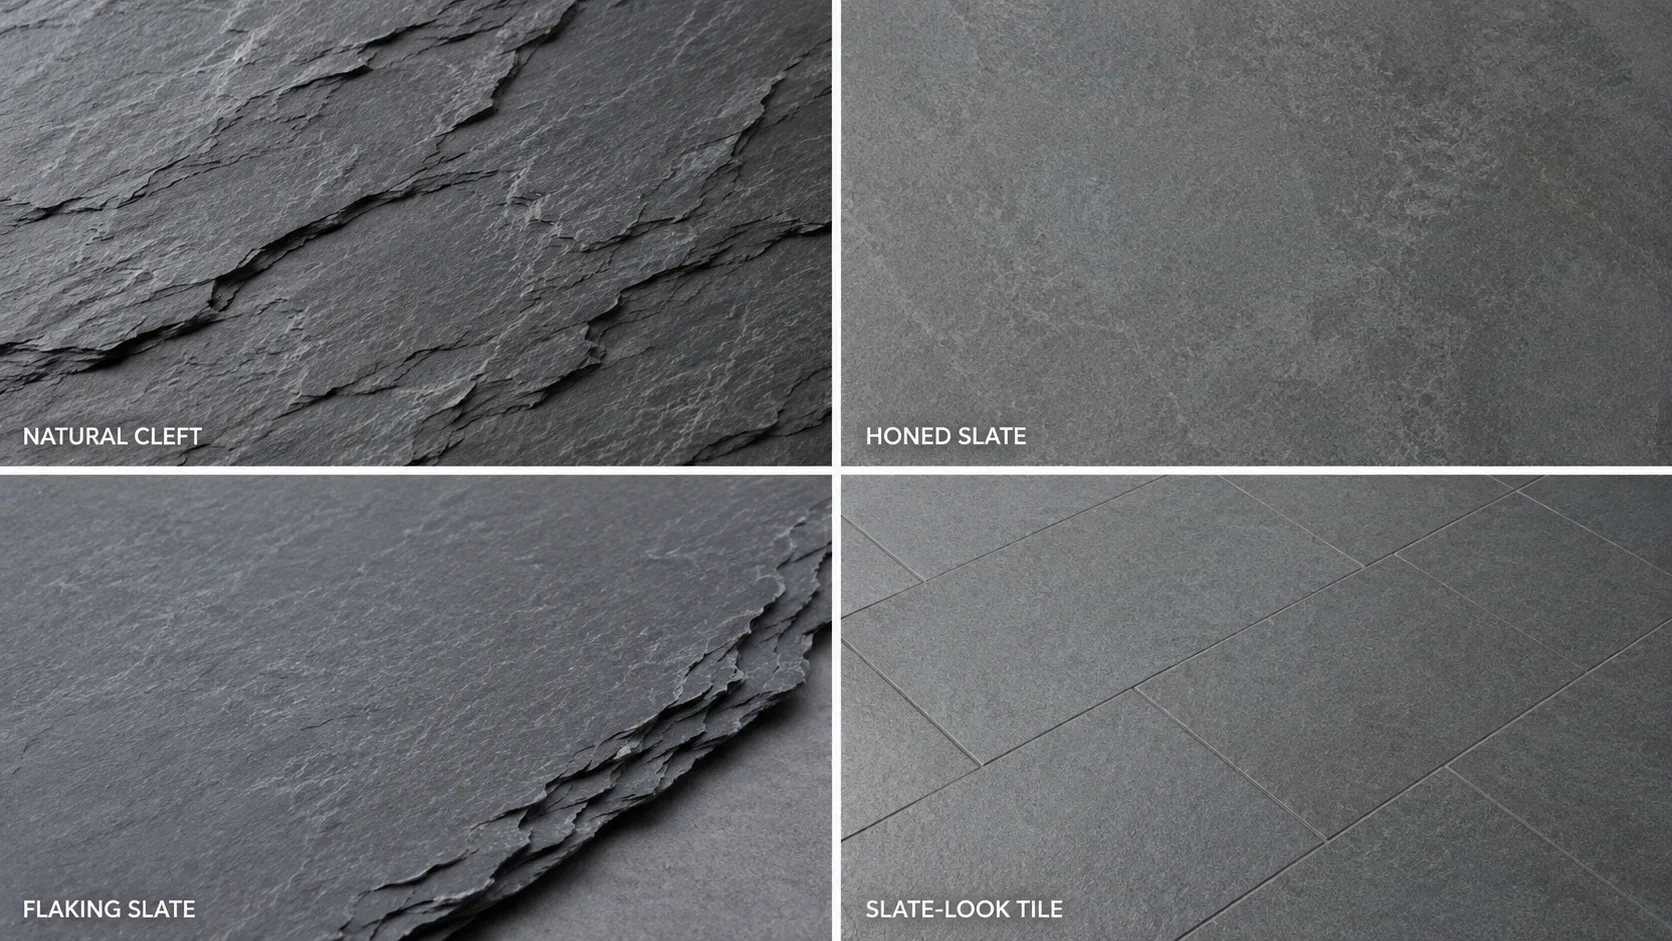
Layered, uneven texture
Raised points may look clean while dirt stays in the recesses. Gentle brushing and dirty-water pickup matter more than aggressive chemistry.
Flatter, smoother finish
Cleaner residue, scratches and uneven sheen can be easier to see. Clean tools and precise dilution are especially important.
Continuous sheen above the texture
The coating—not only the stone—controls chemical compatibility. Identify it before deep cleaning, stripping or recoating.
Thin layers lifting or powdering
Stop wet scrubbing. Loose layers can indicate natural cleaving, weathering or installation-related deterioration that needs evaluation.
Do a 60-second condition check
Photograph the dry surface in normal and angled light. Then check whether the problem sits on top of the tile, in its recesses, beneath a coating or within the stone.
| What you see after drying | Possible explanation | Safest next move |
|---|---|---|
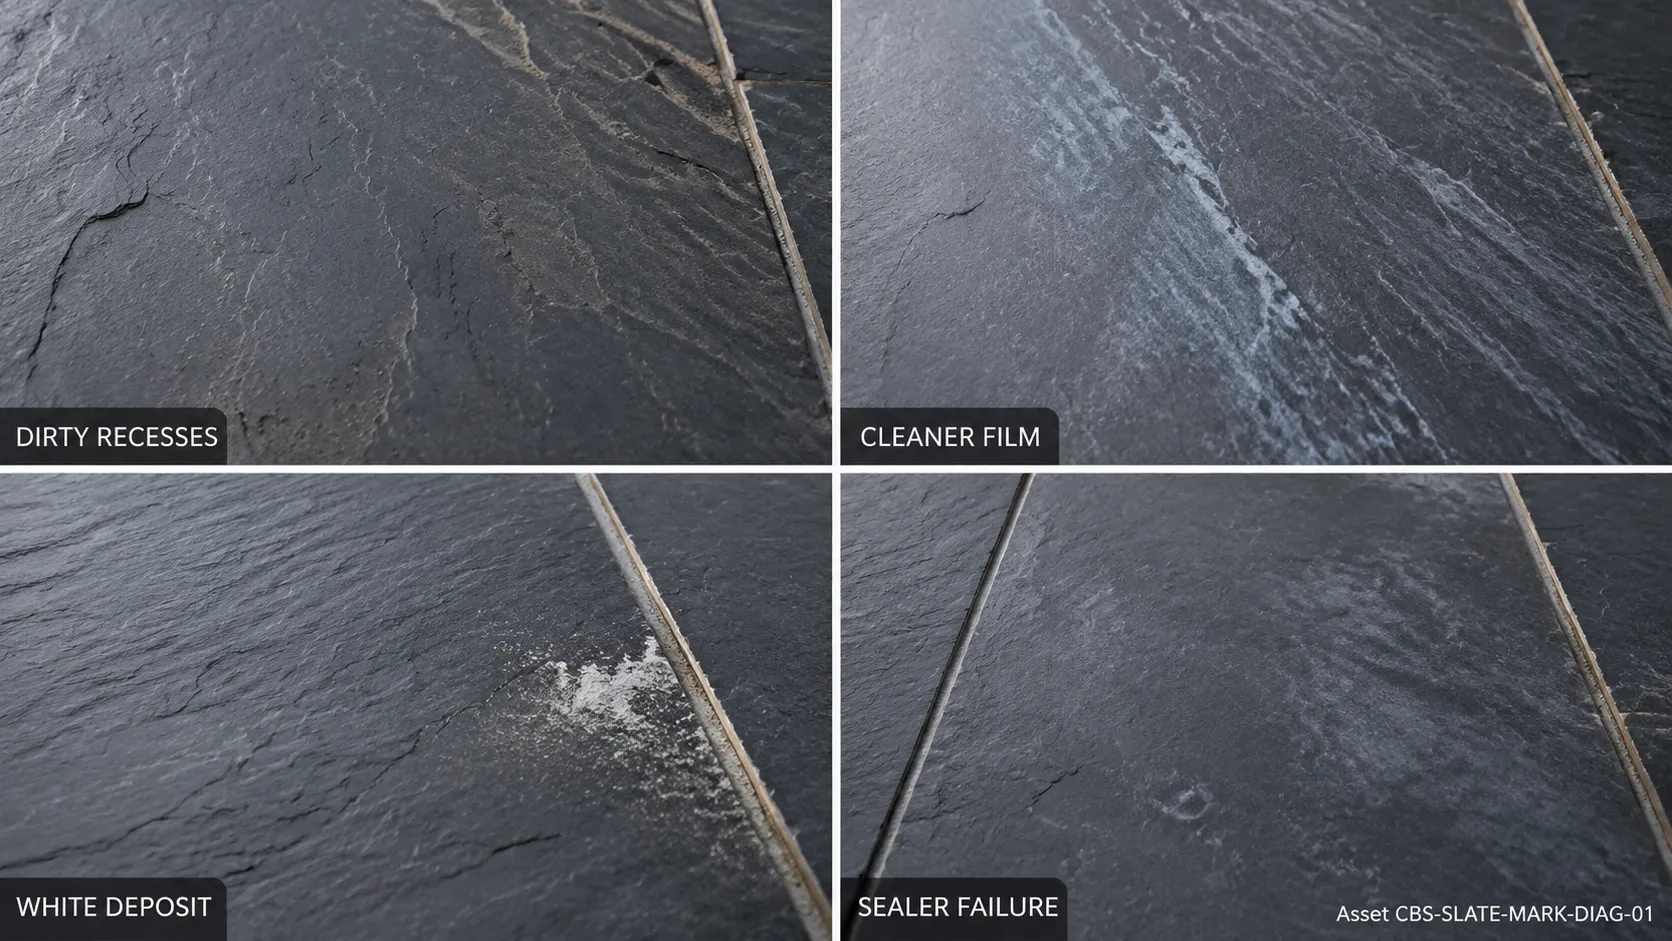
| Gray soil remains mainly in low texture | Dirt trapped below the mop’s contact area | Repeat a small section with soft-nylon agitation and thorough pickup. |
| Uniform streaks or cloudy film | Excess cleaner, dirty tools or incomplete rinsing | Try one controlled plain-water rinse, then dry with clean towels. |
| Pale powder returns near joints | Possible mineral movement or efflorescence | Stop repeated washing and investigate the moisture source. |
| Milky patch beneath a visible sheen | Topical-coating or trapped-moisture problem | Identify the coating; do not add another product over it. |
| Thin layers lift or edges crumble | Flaking, cleaving or deterioration | Stop scrubbing and seek stone/installation guidance. |
| Dark mark remains after full drying | Absorbed oil, moisture or another stain | Identify the contaminant before choosing a stain treatment. |
Tools and supplies
Avoid worn vacuum wheels, rotating beater bars, metal brushes and dark towels that may transfer dye to pale grout or untreated stone.
How to clean slate tiles in seven controlled steps
Remove loose grit first
Sweep, dust-mop or vacuum using a hard-floor-safe attachment. Work along edges and into visible clefts without grinding debris against the surface.
Checkpoint: no loose grit is visible or audible beneath the cleaning tool.
Test a hidden area
Test the cleaner at label dilution in an inconspicuous spot that includes tile and grout. Let it dry fully and compare color, sheen, texture and coating response.
Checkpoint: no color transfer, softening, whitening, stickiness or sheen change.
Mix only the amount you need
Follow the label’s dilution—not the assumption that more concentrate cleans better. Too much surfactant can leave a dull, dirt-attracting film.
Checkpoint: solution is accurately diluted in a clean container.
Work in small sections
Apply enough solution to wet the working surface without flooding joints or leaving puddles. Do not let the cleaner dry on the tile.
Checkpoint: you can agitate and remove the solution before it dries.
Agitate the texture gently
Use microfiber on smoother slate and a soft nylon brush on natural-cleft recesses. Moderate, overlapping strokes are preferable to hard scrubbing.
Checkpoint: dirt releases into the solution without stone layers or coating lifting.
Pick up dirty solution and rinse as directed
Lift the gray solution with clean pads, towels or suitable extraction. Change water when it becomes visibly dirty. If the cleaner calls for rinsing, use fresh water and pick that up too.
Checkpoint: the final pickup is substantially clearer and does not feel soapy.
Dry completely before deciding what remains
Use clean absorbent towels and normal ventilation. Wet slate naturally looks darker, so evaluate haze, color and sheen only after the surface has returned to a stable dry appearance.
Checkpoint: no standing moisture remains and the appearance has stabilized.
Slate cleaning decision path
Use the dry result—not the wet appearance—to choose the next move.
How to clean rough natural-cleft slate
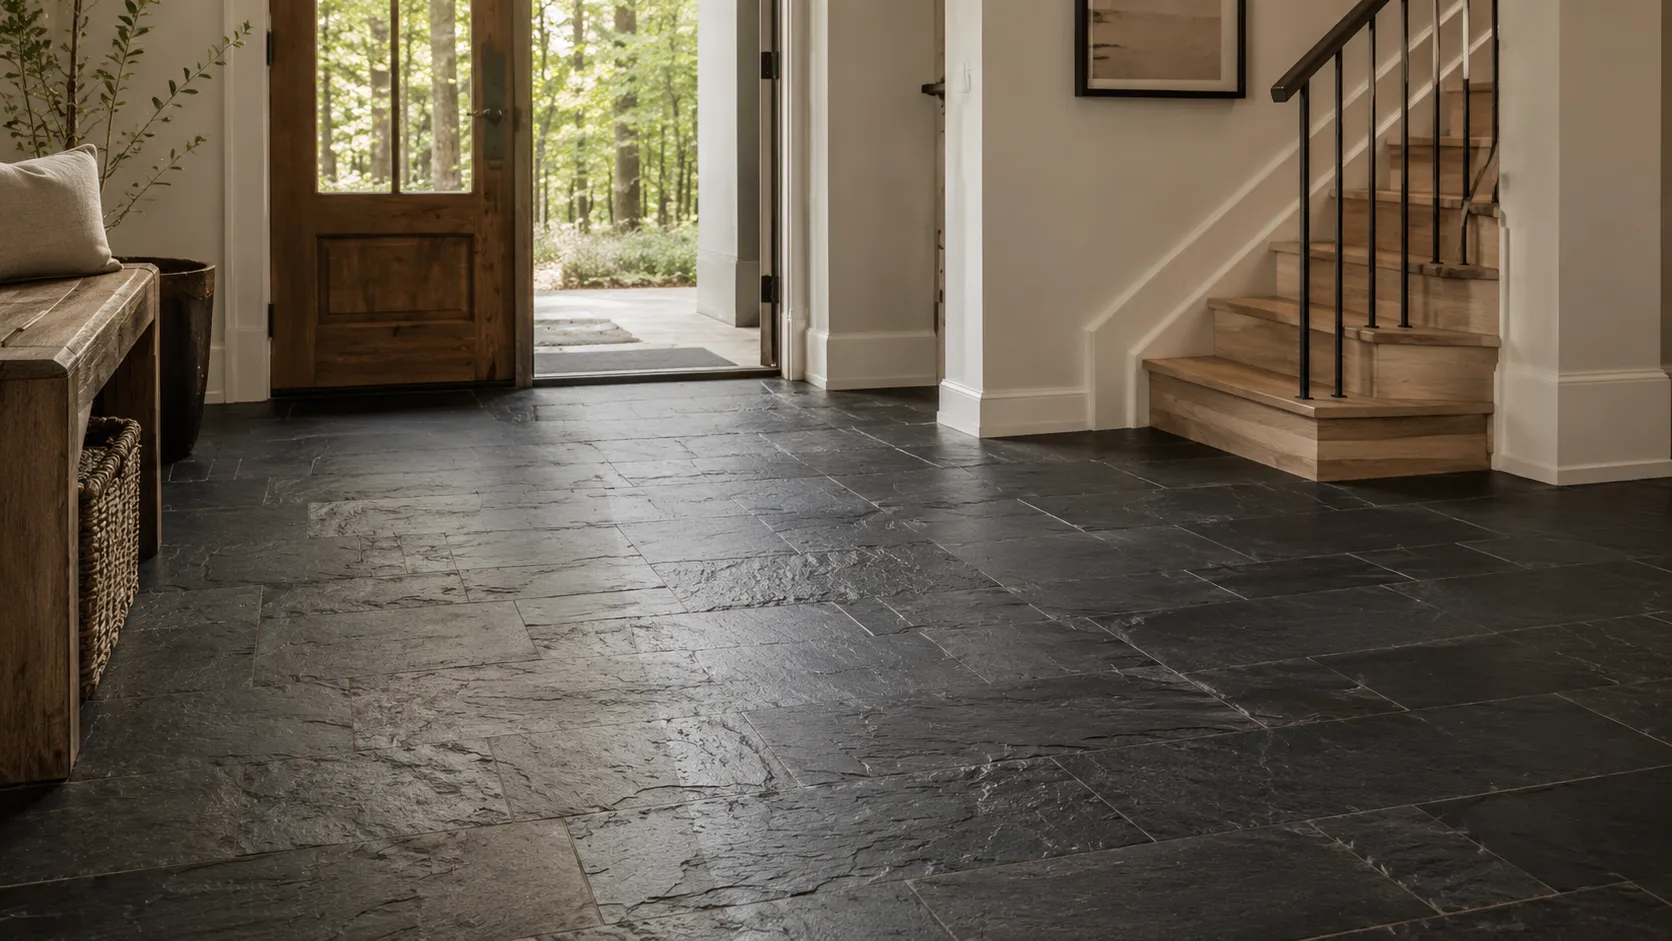
A flat mop often touches only the high points of cleft slate. This is why a floor may look briefly better while gray soil remains in the lower texture. The answer is not automatically stronger cleaner.
- Vacuum or sweep the clefts thoroughly.
- Divide the floor into manageable sections.
- Apply label-diluted neutral stone cleaner without flooding.
- Use a soft nylon brush to follow the texture from several directions.
- Pick up the released soil while it is still suspended.
- Rinse only as the cleaner directs and extract again.
- Dry and compare the test section before continuing.
Adjust the method for the finish and treatment
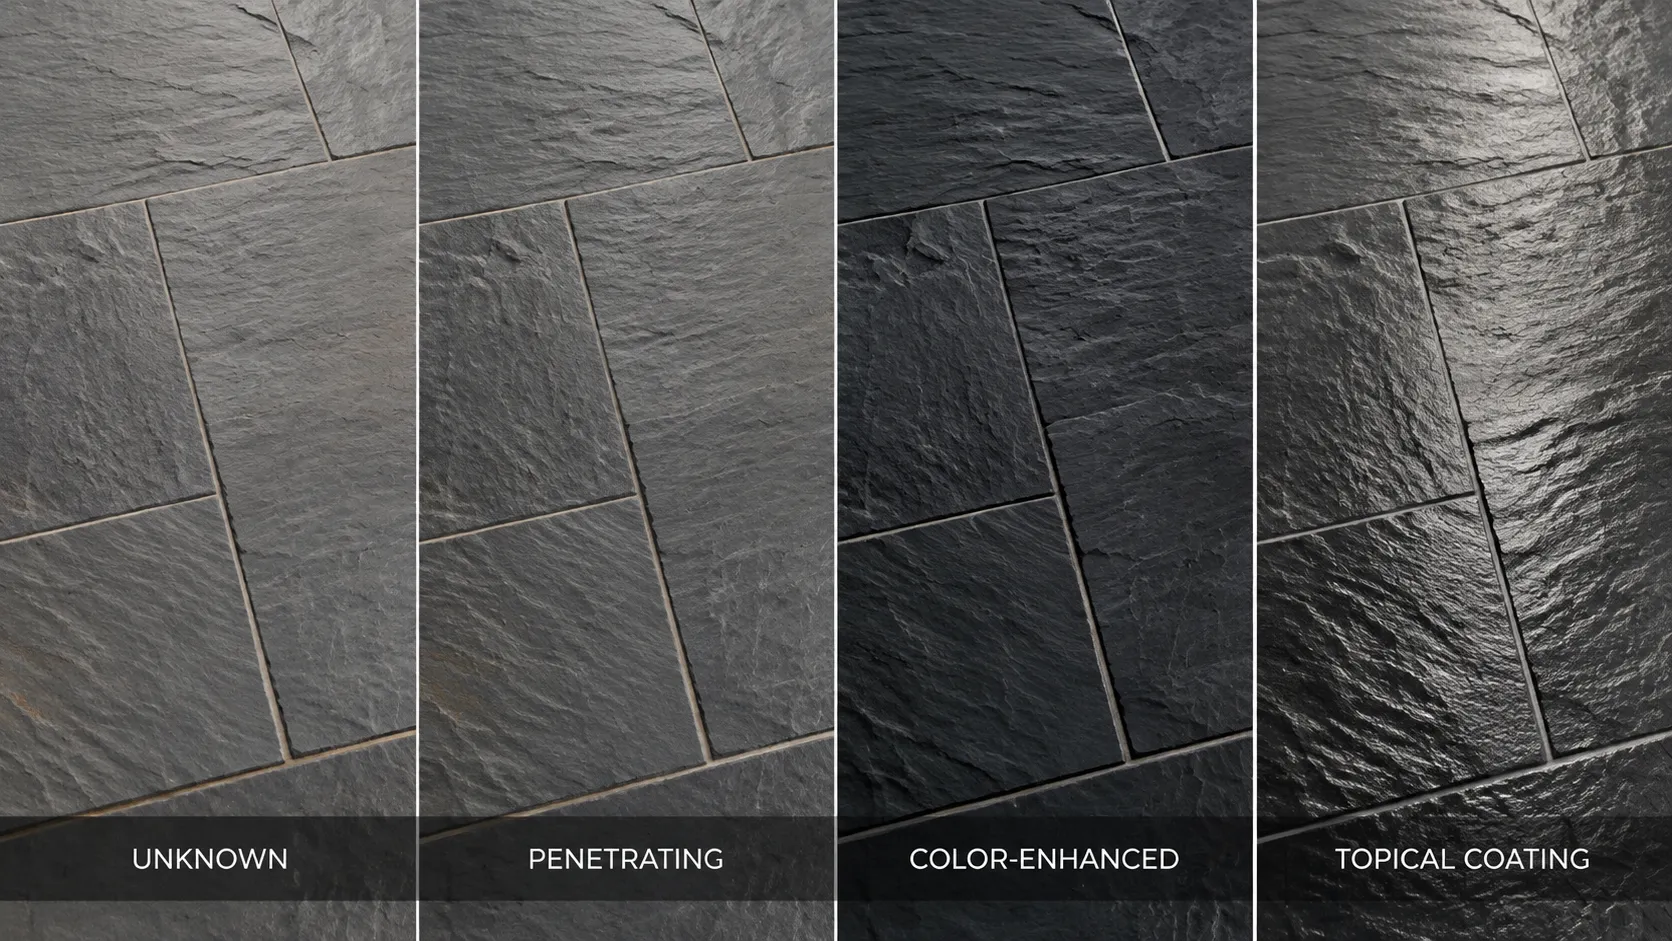
Unknown or possibly untreated
Use conservative moisture, a small test area and short working times. Do not assume rapid darkening proves the tile must be sealed immediately.
Penetrating sealer
It usually sits within pores rather than forming a visible film. Routine neutral cleaning protects its service life, but it does not make slate stain-proof.
Color-enhancing treatment
This deliberately deepens the stone’s color. Uneven appearance after cleaning may involve the treatment, not remaining soil.
Topical coating
A film lies above the stone. Cleaner chemistry, standing moisture, wear and recoating compatibility become critical.
Change the method for the installation
Indoor slate floors
Prioritize frequent grit removal, clean mop pads and small amounts of solution. Keep people and pets off the area until it is dry and no longer slippery.
Kitchen slate
Remove surface grease with a cleaner explicitly approved for the slate and its treatment. A dark spot that remains after drying may be absorbed oil and belongs in a stain-removal process—not endless whole-floor washing.
Slate shower tile
Confirm that grout, silicone and drains are intact. Ventilate, clean manageable sections and keep the selected cleaner off incompatible adjacent metal or stone. Persistent white scale cannot be treated safely until the stone and sealer are identified; common acidic descalers may not be compatible.
Outdoor slate
Sweep leaves and grit, protect nearby plants according to the cleaner label, and prevent contaminated runoff. Pressure washing is not a default: weak layers, grout, joints and bedding can be affected.
Slate hearth
Work only when the hearth is completely cool. Dry-remove ash first and avoid driving moisture into adjoining wood, metal, joints or porous masonry.
Why slate looks white, cloudy or dusty after cleaning
Start with one controlled rinse on a small section if the surface feels or looks like cleaner film. If the pale appearance returns from joints, sits beneath a coating or includes flaking, stop treating it as residue.
Reasonable one-time check
- Fresh clean water
- Clean white microfiber
- Small test section
- Immediate dirty-water pickup
- Complete drying before comparison
Do not keep repeating
- Stronger cleaner each round
- Acid on an unidentified deposit
- Another coat of unknown sealer
- Hard abrasion on high points
- Flooding a possible moisture problem
A powdery deposit that returns may indicate mineral movement associated with moisture. A milky appearance under a continuous sheen may involve a topical coating. Neither should be diagnosed from a photograph alone when the moisture source or original treatment is unknown.
If a stain remains after the tile is clean
Ordinary cleaning removes surface soil. An absorbed stain requires identifying the contaminant and selecting a compatible treatment. The Natural Stone Institute’s stain guidance likewise begins with identifying the stain rather than prescribing one paste for every mark.
| Remaining mark | What to establish first | Why not to guess |
|---|---|---|
| Dark greasy spot | Oil/grease source and treatment type | Surface detergent may not remove absorbed oil. |
| Orange-brown mark | Rust versus organic discoloration | Rust chemistry can be harsh and material-specific. |
| Green/black growth outdoors | Biological growth, drainage and runoff constraints | Biocides and bleach may affect stone, sealer, plants and waterways. |
| White crust | Cleaner residue, mineral scale, efflorescence or grout residue | These look similar but require different treatment paths. |
| Changed sheen | Residue versus worn/altered coating | Cleaning cannot replace a physically changed finish. |
Does slate tile need to be sealed?
Not every slate installation needs the same treatment or resealing interval. A sealer can improve resistance to absorbed contaminants, but it does not make the tile stain-proof. A penetrating impregnator also may not make the surface shiny.
Before sealing or recoating, identify the current product, confirm that tile and grout are clean and fully dry, and follow the stone, installation and treatment manufacturers’ instructions. Do not rely only on an annual calendar or on visible shine. The Natural Stone Institute notes that impregnators repel contaminants rather than making stone stain-proof and that not every stone necessarily requires sealing.
What not to use as a universal slate cleaner
Preferred baseline
- Manufacturer-approved pH-neutral stone cleaner
- Accurate label dilution
- Soft microfiber and nylon tools
- Clean rinse water when required
- Controlled moisture and complete drying
Avoid by default
- Vinegar, lemon or acidic descalers
- Abrasive powders and metal brushes
- Undiluted concentrate
- Oil or wax used merely to hide dullness
- Steam or pressure washing without approval
Vinegar and acids
Slate is not identical to calcite-rich marble, so it is too broad to say every acid affects every slate in precisely the same way. Nevertheless, acidic products can affect certain stone components, grout and treatments. Slate-specific maintenance guidance from STONETECH/LATICRETE cautions that acidic, highly alkaline, abrasive, ammonia-containing or bleach-based cleaners may damage some slate, grout or applied sealers. Use an acid only if every relevant manufacturer explicitly permits it.
Bleach, ammonia and mixed cleaners
Never mix cleaning chemicals. Do not use bleach or ammonia as a universal slate recipe; compatibility, ventilation, surrounding materials and label instructions all matter.
Steam and pressure
Heat, moisture and pressure can affect weak slate layers, grout, joints, coatings and underlying assemblies. Use these methods only when the exact tile, treatment and installation guidance allows them.
How to keep slate cleaner with less wet washing
- Use entry mats that do not trap moisture or stain the stone.
- Remove abrasive grit before it is walked across the floor.
- Blot spills instead of spreading them.
- Wash mop heads and brushes before reuse.
- Measure cleaner rather than pouring by eye.
- Change solution and rinse water once visibly dirty.
- Correct drainage, leaks and failed joints instead of repeatedly cleaning their symptoms.
- Evaluate treatments by condition and manufacturer instructions—not a universal calendar.
Frequently asked questions
What is the safest cleaner for slate tiles?
A properly diluted pH-neutral cleaner specifically approved for natural stone and compatible with the existing sealer or coating is the safest general baseline. Always test a hidden spot and follow its label.
Can I clean slate tile with vinegar?
Do not use vinegar by default. Although slate differs from marble, acid may affect some slate components, grout or surface treatments. Use it only if the exact material and treatment manufacturers approve it.
How do I clean rough slate floor tiles?
Dry-remove grit, apply diluted neutral stone cleaner in small sections, agitate the low clefts with a soft nylon brush, and pick up the dirty solution before it dries. Rinse as directed and inspect after complete drying.
Why does my slate look white after mopping?
Possible causes include cleaner film, dirty rinse water, mineral deposits, grout residue, moisture beneath a coating or physical flaking. Try one controlled rinse only when film is likely; stop if the white material returns or the finish changes.
Can baking soda be used on slate?
It should not be treated as a universal remedy. It can leave residue and its mild abrasiveness may be inappropriate for some finishes or coatings. Use a manufacturer-approved method for the identified problem.
Can I steam-clean slate floors?
Only if the slate, sealer, grout and complete floor assembly are approved for steam. Heat and moisture may affect coatings, joints and underlying materials, so steam is not the default method.
How can I tell whether slate is sealed?
Visible shine is not proof because penetrating sealers may not change sheen. Check product records or ask the installer. Absorption observations can provide a clue but do not identify the sealer chemistry.
Does slate need sealing every year?
No universal annual schedule applies. Need depends on the slate, location, traffic, existing treatment and manufacturer instructions. Adding product over an unknown coating can cause problems.
Can I pressure-wash outdoor slate?
Do not assume so. Pressure can affect weak layers, grout, joints and bedding. Use it only when the material and installation guidance permits a specified pressure and technique.
Why is my slate floor flaking?
Slate can naturally cleave in layers, but pronounced or worsening flaking may involve stone quality, weathering, moisture, coating or installation conditions. Stop aggressive cleaning and have the condition evaluated.
Sources and further guidance
- Natural Stone Institute: natural-stone care
- Natural Stone Institute: stain identification and removal
- MSI: slate tile maintenance
- MSI: how to clean slate tile floors
- STONETECH/LATICRETE: natural slate maintenance and care
This guide provides general surface-care information. Product instructions, warranties and installation-specific advice take priority.
Related CareBySurface guides: Compare this method with cleaning travertine tiles, learn how to clean shower glass without damaging adjacent materials, or use the finish-aware guide to clean shower mold safely.