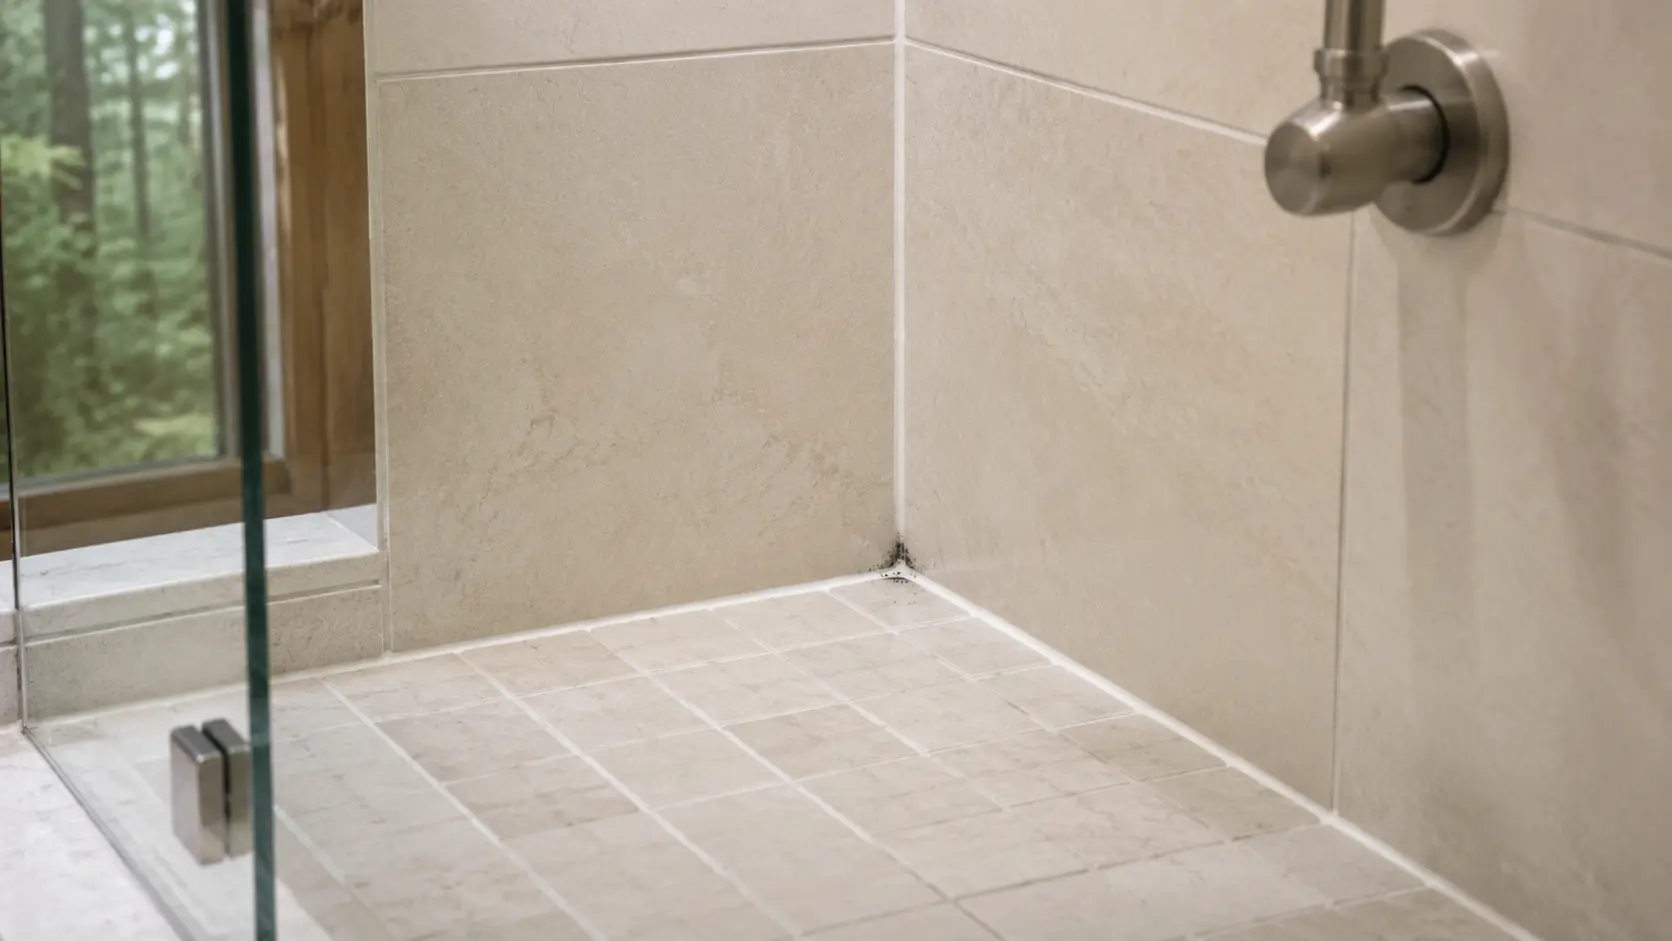
The safest method starts before you spray anything. Identify the mark, check the shower material, remove visible growth with the least aggressive compatible method, then fix the moisture condition that allowed it to return.
How to clean shower mold safely
For a small patch on a washable, compatible shower surface, ventilate the room, wear suitable protection, remove soap film with mild detergent, gently scrub or wipe away all visible growth, rinse as the product label directs and dry the area completely. Identify tile, grout, caulk, stone or acrylic before using bleach, vinegar, peroxide, steam or an abrasive tool. If mold is inside failing caulk or returns quickly, repair the joint or moisture source instead of repeatedly bleaching the stain.
Never mix mold cleaners
Do not mix bleach with vinegar, ammonia, hydrogen peroxide, toilet cleaner, drain cleaner or any other cleaning product. Dangerous vapors can form. If you do not know what was previously applied, ventilate the room, follow that product’s rinsing directions and postpone additional chemistry. Use only one compatible method in a cleaning session.
Shower mold is frustrating because the visible spot is only part of the problem. A cleaner can lighten a dark mark without removing contaminated residue, and aggressive scrubbing can damage grout, silicone, acrylic, fiberglass or a protective coating. The long-term result depends on three separate jobs: remove what is growing, preserve the surface and make the area dry faster.
First, check whether the mark is actually mold
Do not identify a mold species—or its danger—from color alone. Mold can appear in many colors, and dark spotting is not proof of Stachybotrys or a uniquely dangerous “black mold.” If visible growth is present, the practical task is to remove it safely and correct the moisture problem, not guess the species from a photograph.
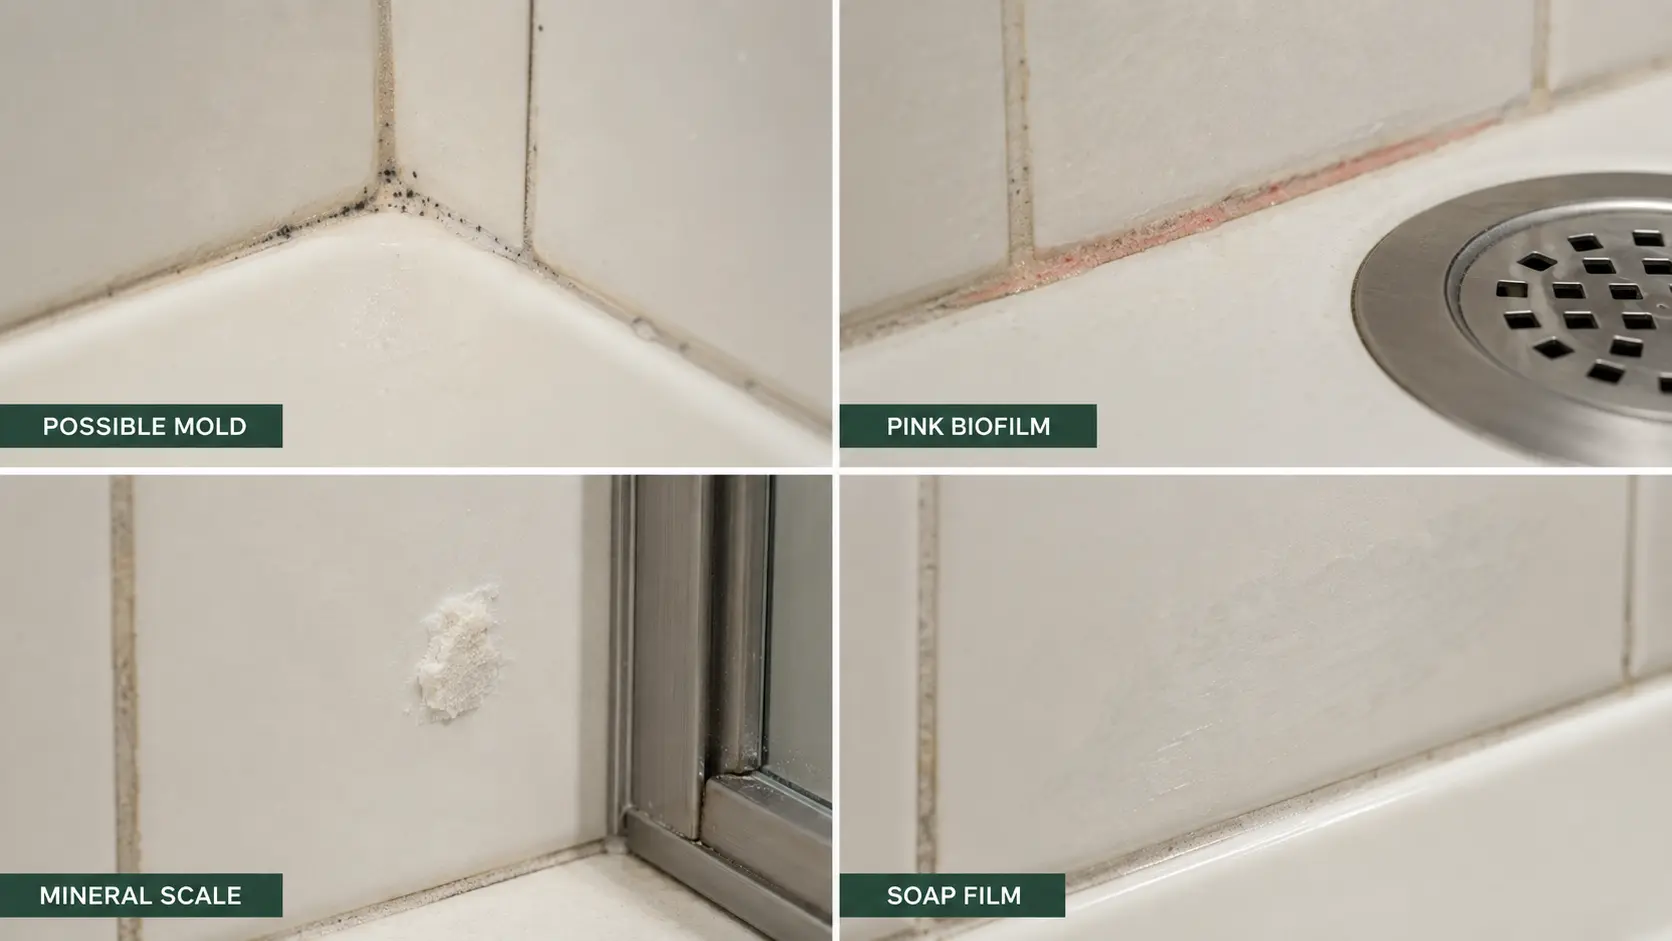
| What you see | More likely explanation | First response |
|---|---|---|
| Irregular black, green or gray spotting with a musty odor | Possible fungal growth | Follow the small-area mold pathway below. |
| Pink, coral or orange slippery film | Often a bacterial biofilm rather than ordinary fungal mold | Clean the film and improve drying; use a separate sanitation guide. |
| White, crusty or raised deposit | Hard-water minerals | Do not use a mold treatment; identify the surface before descaling. |
| Gray, waxy or smeary coating | Soap, body oil or cleaner residue | Begin with compatible detergent and thorough rinsing. |
| Grout darkens when wet and lightens as it dries | Moisture absorption | Allow full drying; inspect sealer, cracks and water exposure. |
| Flat black dots inside otherwise sound silicone | Embedded staining or growth within/behind caulk | Avoid endless chemical escalation; assess replacement. |
Decide whether this is a reasonable DIY cleanup
Stop before cleaning if the problem is extensive or hidden
A homeowner can often handle a small, accessible patch on a hard surface. The U.S. EPA uses about 10 square feet—roughly a 3-by-3-foot area—as a general point below which DIY cleanup may be reasonable in many cases. Size is not the only factor.
DIY may be reasonable when
- The patch is small and accessible.
- The surface is hard and washable.
- There is no major water damage.
- No demolition or joint removal is required.
- You can ventilate the room and use suitable protection.
Seek qualified help when
- The area approaches or exceeds 10 square feet.
- Growth may be behind tile, wallboard or a ceiling.
- There was flooding, sewage or substantial water damage.
- A musty odor persists without a visible source.
- Growth returns after the moisture cause was addressed.
- Cleanup requires demolition.
People with asthma, COPD, severe mold sensitivity or compromised immunity should avoid exposure during cleanup and seek appropriate health or professional guidance.
Identify the shower surface and finish
The cleaner touches more than the dark spot. It can run onto grout, natural stone, a coated glass panel, an acrylic base or metal trim. The most sensitive adjacent material should control the method.
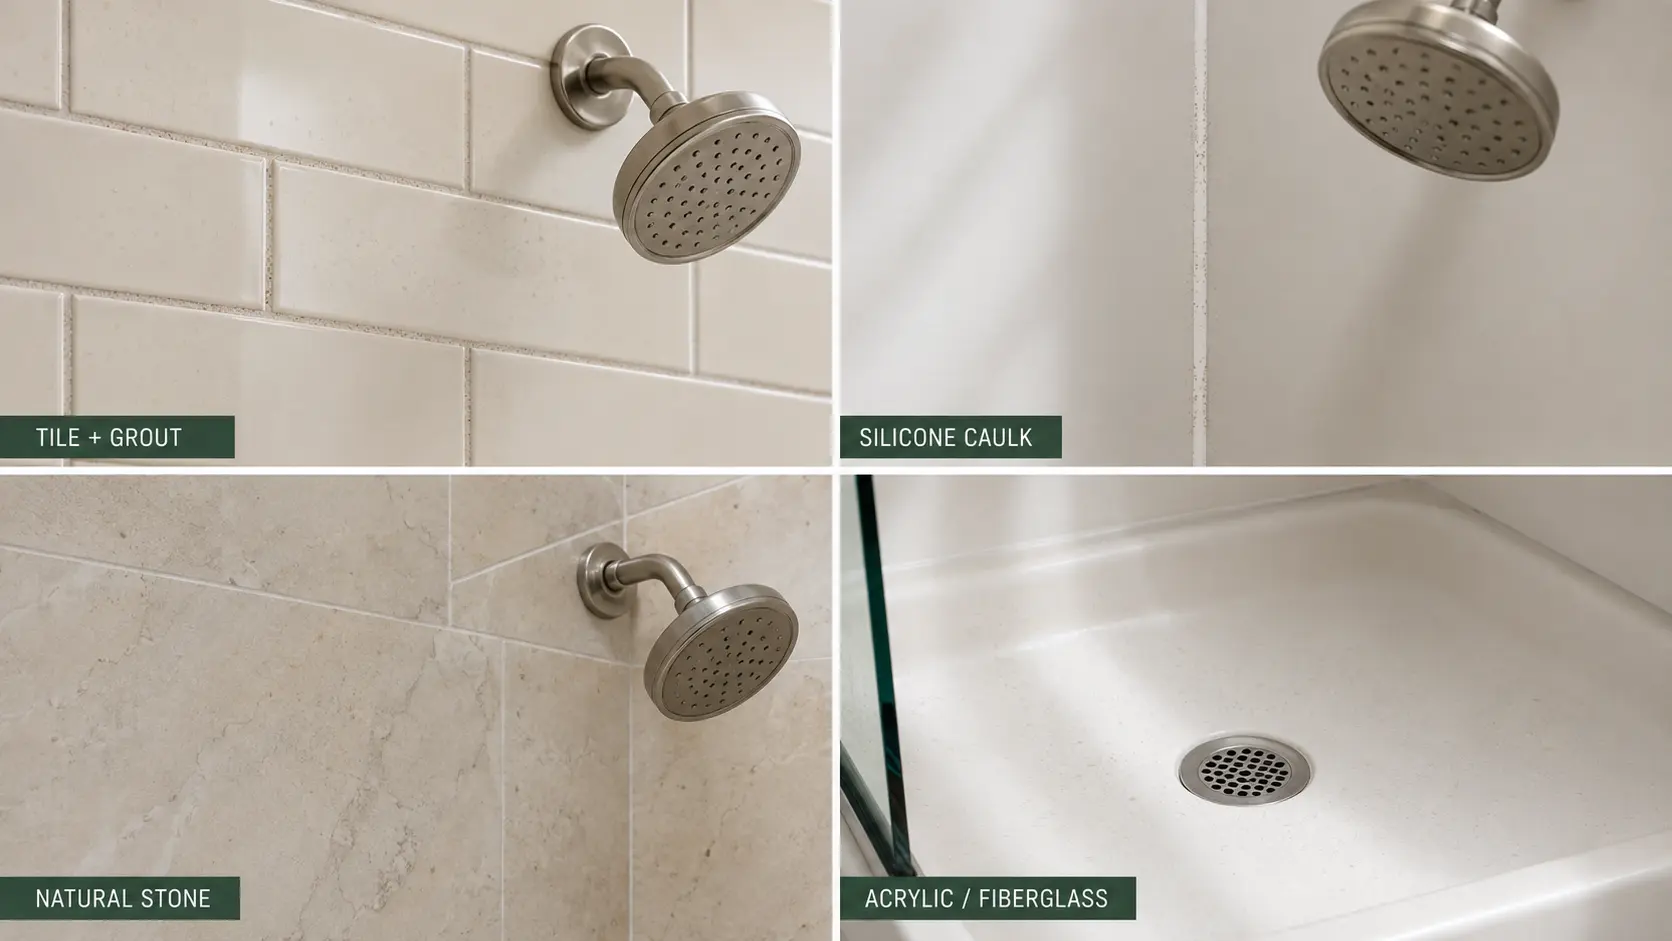
Glazed ceramic or porcelain
The tile face is usually durable, but grout, decorative details and nearby fixtures can be less resistant.
Cement grout
Porous and easy to discolor or abrade. Check for cracks, missing material and sealer condition.
Silicone caulk
Flexible joint material. Scraping or hard brushing can lift an edge and create a water-entry path.
Natural stone
Marble, limestone and travertine are acid-sensitive. Vinegar can etch the stone even when it appears to clean the joint.
Acrylic or fiberglass
Can scratch, dull or chemically discolor. Follow the shower manufacturer’s care list and use nonabrasive tools.
Coated glass and metal
Protect easy-clean coatings, PVD, plated finishes and living metals from unapproved acids, chlorine and abrasives.
What you need
Baseline kit
- Nonporous cleaning gloves
- Eye protection
- Appropriate respiratory protection when guidance calls for it
- Clean microfiber cloths
- Soft nonabrasive sponge
- Soft nylon detail brush, only where compatible
- Mild unscented detergent
- Clean water and dry towels
- Disposable bag for contaminated waste
Do not start with
- Wire or metal brush
- Razor blade
- Scouring powder
- Melamine foam on an unknown finish
- Acid on natural stone
- Several cleaners used in sequence
- Unlabeled homemade chemical mixture
- High-pressure or uncontrolled steam
How to clean shower mold in 7 finish-aware steps
Photograph and inspect the dry area
Take a clear photo before cleaning. Estimate the affected size and inspect grout, caulk edges, corners, shelves, drainage and nearby finishes. Look for a leaking fixture, cracked joint, pooled water or a cold condensation-prone wall. If caulk is loose or water appears to be entering the assembly, stop using the shower until the joint is assessed.
Ventilate and protect the work area
Run an exhaust fan that vents outdoors, and open a window or door when conditions allow. Keep children, pets and vulnerable occupants away. Wear gloves and eye protection; use respiratory protection appropriate to the cleanup guidance and your circumstances. Avoid dry brushing, which can disturb particles.
Remove bottles, curtains and loose residue
Clear the ledge so every wet shadow can dry. Wash compatible removable items separately and discard items that cannot be cleaned. Do not use the same dirty cloth across the entire shower. Fold or change cloth surfaces as they become soiled.
Pre-clean soap and body-oil film
Use a small amount of mild, surface-compatible detergent with a damp cloth or soft sponge. Soap film can shield growth and makes stronger chemicals less predictable. Work gently, then remove the dirty solution with a clean damp cloth or controlled rinse. Do not flood cracked grout or open joints.
Physically remove visible growth
Reapply the compatible detergent solution and wipe or lightly agitate the affected area. Use a soft nylon detail brush only on a surface that permits it; do not scrub silicone edges, acrylic or coatings aggressively. The goal is to lift and remove visible material—not merely turn a dark stain white.
Escalate only when the surface and label agree
If visible residue remains, choose one product whose label lists the exact surface and intended use. Follow its dilution, dwell time, ventilation, PPE and rinsing directions. Protect adjacent stone and metal. Never mix methods, improvise contact time or assume that stronger concentration is more effective.
Rinse or wipe, dry completely and recheck
Remove cleaner and loosened residue as directed. Dry the shower with clean towels and improve airflow. Inspect again only after the joint and surface are fully dry. A flat stain inside sound caulk may be cosmetic; lifting caulk, recurring darkness or dampness behind a joint calls for repair rather than another chemical treatment.
Shower mold decision path
Adjust the method to the shower material
Glazed ceramic or porcelain tile
Use the seven-step baseline on the tile face, but choose tools and chemistry for the grout and trim as well. Keep dirty solution from drying on the surface. If black marks follow cracks or missing grout, the joint needs repair after it is properly cleaned and dried.
Cementitious grout
Use controlled moisture and gentle agitation. A dark line that remains after cleaning may be permanent discoloration, a worn sealer or contamination beneath the surface. Do not grind away sound grout with an overly stiff brush. If the grout is powdery, deeply cracked or missing, cleaning is no longer the complete solution.
Epoxy grout
Do not assume a cement-grout recipe applies. Identify the grout product if possible and use its manufacturer’s cleaning guidance. Epoxy grout is less absorbent, but it can still collect surface film and mold where joints stay wet.
Silicone caulk
Wipe the surface gently. Do not cut, scrape or aggressively brush an intact waterproof joint. If spotting appears beneath the bead, the edge is lifting or the sealant has softened, plan replacement and investigate why water remained behind it.
Natural-stone shower
Use a pH-neutral cleaner labeled for the exact stone and protect the sealer. Do not use vinegar, lemon, citric acid or an acidic bathroom spray on marble, limestone or travertine. For more stone-specific care, see how to clean travertine tiles safely and our guide to whether vinegar is safe for marble.
Acrylic, fiberglass and molded composite surfaces
Use only nonabrasive tools and a manufacturer-approved cleaner. Some manufacturers prohibit abrasive brushes or particular bleach uses. Test unfamiliar products in an inconspicuous area and stop if gloss, color or texture changes.
Glass and metal finishes
Do not let mold cleaner run onto coated glass, natural stone or decorative metal. Rinse and dry fixtures promptly when their care instructions permit. Acids, chlorine and abrasives can alter plated, PVD, matte-black, brass and nickel finishes.
Bleach, vinegar or hydrogen peroxide?
There is no universal winner. Government guidance varies, and a method that is acceptable for a plain nonporous tile may still damage adjacent stone, grout, sealant or metal. Start with physical cleaning and drying, then follow the surface manufacturer and the chosen product label.
| Option | Possible role | Main limitation | Decision |
|---|---|---|---|
| Mild unscented detergent | Baseline removal on many washable surfaces | Must still remove residue and dry the area | Preferred starting point |
| 3% hydrogen peroxide | Targeted escalation where the material permits | May affect colored grout, caulk or finishes; never mix | Check label and spot-test |
| Registered/labeled mold cleaner | Product-specific contact time and use | Not safe for a surface absent from its label | Follow label exactly |
| Chlorine bleach | Permitted on some compatible nonporous surfaces under some guidance | Fumes, discoloration and material restrictions; never mix | Not a universal baseline |
| White vinegar | Used by some authorities on compatible surfaces | Etches acid-sensitive stone and may conflict with grout/finish guidance | Never assume compatibility |
| Steam | Can loosen soil on manufacturer-approved assemblies | Heat/moisture may affect sealers, coatings, joints and substrates | Use only when explicitly permitted |
When moldy shower caulk should be replaced
Silicone is a waterproofing joint, not just a decorative line. Endless soaking can make a cosmetic stain look better while the joint continues to fail.
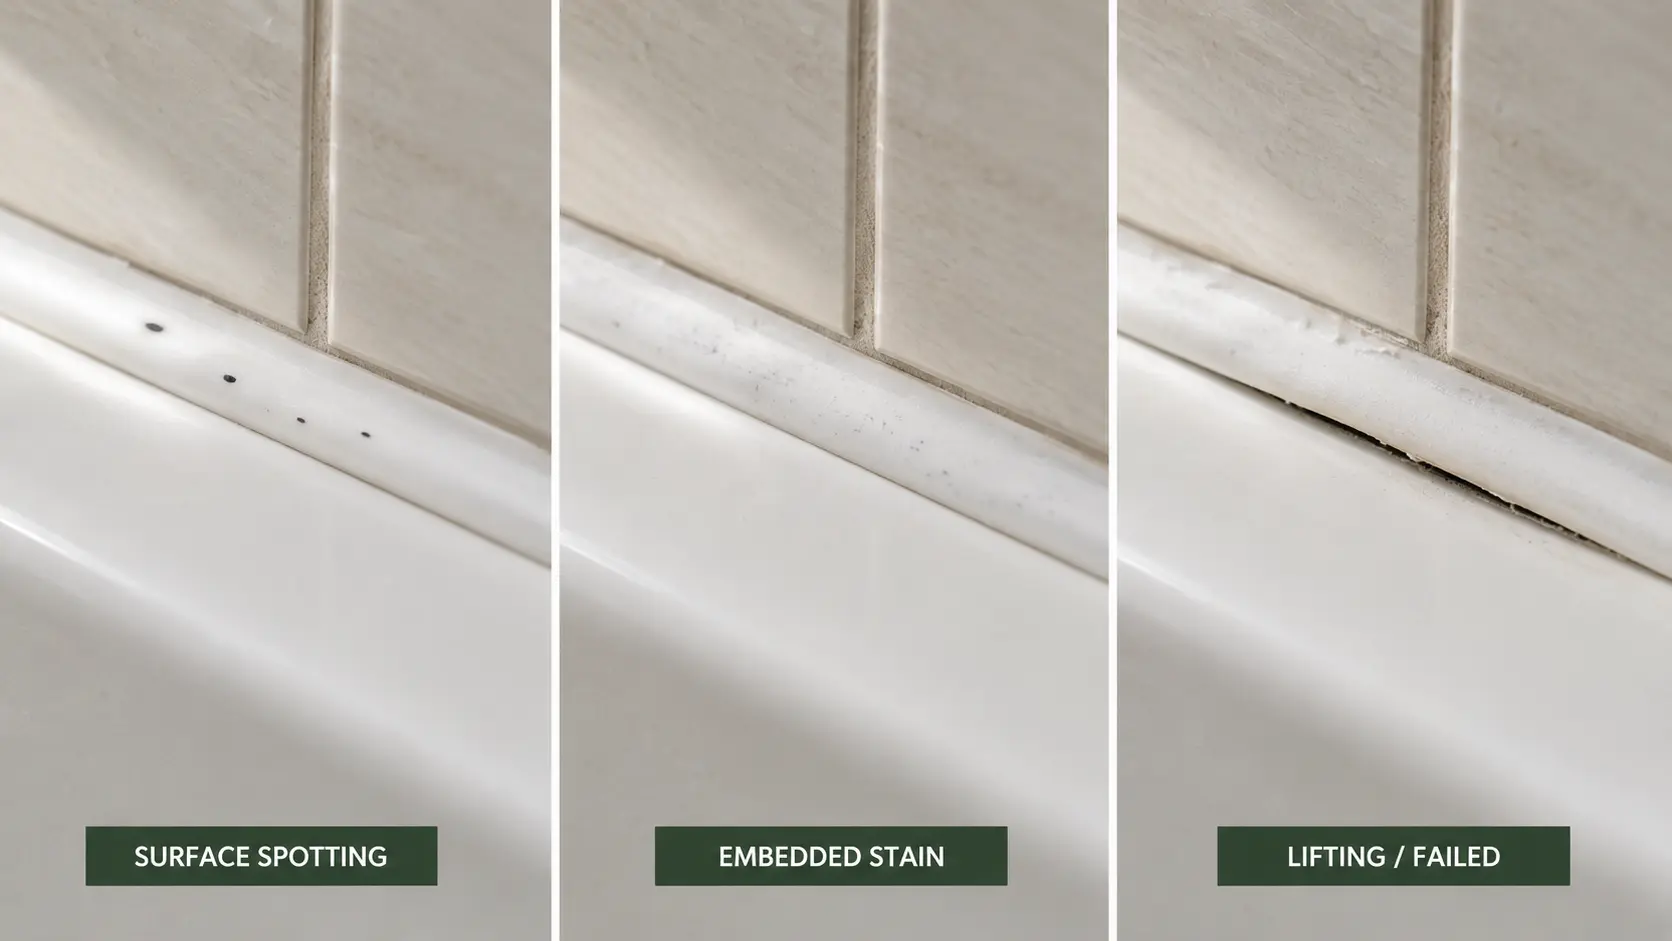
| Caulk condition after drying | What to do |
|---|---|
| Surface spotting wipes away; bead remains firm and attached | Clean, dry and monitor. |
| Flat dark stain remains; bead is intact | Accept possible cosmetic staining rather than repeatedly escalating chemistry. |
| Black marks appear beneath the silicone | Remove and inspect the joint; do not caulk over contamination. |
| Edge is lifting, split or detached | Replace the sealant and investigate water entry. |
| Caulk is soft, gummy or crumbling | Stop cleaning and replace it with the correct shower-rated sealant. |
| Same joint darkens quickly after cleaning | Check drainage, ventilation and hidden moisture before recaulking. |
Why shower mold keeps coming back
The shower dries too slowly
- Door remains closed
- Curtain stays bunched
- Water pools on ledges
- Bottles trap moisture
- Wet towels stay nearby
Ventilation is inadequate
- Fan is weak or dirty
- Fan does not vent outdoors
- Fan stops too soon
- Indoor humidity stays high
- Cold surfaces collect condensation
Cleaning removed color, not residue
- Soap film remained
- One dirty cloth spread soil
- Cleaner was not removed
- Joint was left wet
- Embedded staining was mistaken for surface growth
A joint or building component failed
- Split caulk
- Cracked or missing grout
- Plumbing leak
- Water behind tile
- Damaged wallboard or ceiling
A practical shower-mold prevention routine
After each shower
- Remove pooled water with a compatible squeegee or towel.
- Leave the enclosure arranged so both sides can dry.
- Spread a curtain instead of leaving wet folds bunched together.
- Run the exhaust fan during the shower and long enough afterward to clear humidity.
- Move bottles and tools away from chronically wet ledges.
Weekly
- Wash away soap and body-oil film with a compatible mild cleaner.
- Clean underneath bottle bases, mats and removable accessories.
- Inspect caulk corners and grout transitions.
- Wash the curtain or liner according to its care label.
Monthly
- Clean the exhaust grille and verify airflow.
- Check that the shower drains without persistent pooling.
- Inspect for cracked grout, lifting caulk and leaking fixtures.
- Track any spot that returns in the same location.
Frequently asked questions
What is the safest way to clean shower mold?
For a small patch on a compatible washable surface, ventilate the room, wear suitable protection, remove soap film with mild detergent, physically wipe or gently agitate away visible growth, rinse or wipe as directed and dry completely. Identify the shower material before using any stronger product.
Can I use bleach to clean shower mold?
Bleach is permitted by some guidance for certain compatible nonporous surfaces, but it is not a universal shower cleaner. It may discolor grout, damage finishes or affect nearby materials. Follow the surface manufacturer and product label, ventilate thoroughly and never mix bleach with another cleaner.
Is vinegar safe for moldy shower grout?
Not automatically. Vinegar is acidic and can affect some cement grout, sealers and nearby finishes. It can etch marble, limestone and travertine. Identify the tile and grout system first; use a stone-safe neutral cleaner anywhere acid-sensitive stone is present.
Does hydrogen peroxide remove mold from shower grout?
Three-percent hydrogen peroxide is used as a targeted option on some compatible surfaces, but it is not safe for every colored grout, caulk or finish. Check the product and surface instructions, spot-test, use ventilation and do not combine it with bleach, vinegar or another cleaner.
Why does mold return after I clean the shower?
Recurring growth usually means the area remains wet or the contamination is inside a failing joint. Check fan performance, drying time, pooled water, soap film, cracked grout, lifting caulk and plumbing leaks. A spot that rapidly returns in the same location deserves moisture investigation.
Can black shower mold be identified by color?
No. Mold species occur in many colors, and color alone does not indicate whether growth is more or less dangerous. Treat visible growth cautiously, remove it, correct the moisture source and seek qualified help when the area is extensive, hidden or associated with health concerns.
When should moldy shower caulk be replaced?
Replace caulk when growth or staining is beneath the bead, an edge is lifting, the sealant is split, soft or crumbling, or the same joint darkens quickly after cleaning. The substrate must be cleaned and thoroughly dried before correct shower-rated sealant is installed.
Can I steam-clean mold from shower grout?
Only when the tile, grout, sealer, caulk and shower manufacturer permit steam. Heat and moisture can affect coatings, sealers, acrylic surfaces and failed joints. Steam should not be a universal first step, especially when water may already be entering the assembly.
When is shower mold too extensive for DIY cleanup?
The EPA uses about 10 square feet as a general point below which many cases may be handled by homeowners. Seek help sooner for major water damage, hidden growth, sewage, demolition, persistent odor, rapid recurrence or when vulnerable occupants could be exposed.
Bottom line
Learning how to clean shower mold safely is less about finding the strongest spray and more about making the correct diagnosis. For a small compatible surface, remove film, physically clean the growth, rinse or wipe and dry. If the mark is inside failed caulk, the area stays damp or growth returns, stop escalating chemistry and correct the joint, leak or ventilation problem.
Authoritative sources
- U.S. EPA: Mold Cleanup in Your Home
- U.S. EPA: Should I Use Bleach to Clean Up Mold?
- CDC: Mold Cleanup Guidelines
- CDC/NIOSH: Mold, Testing and Remediation
- Health Canada: Moisture and Mould Indoors
- NSW Health: Mould
- Sterling/Kohler: Bath and Shower Care
Editorial note: This guide addresses small household surface-cleaning situations. It does not diagnose mold species, provide medical advice or replace manufacturer instructions, professional assessment or local public-health guidance.